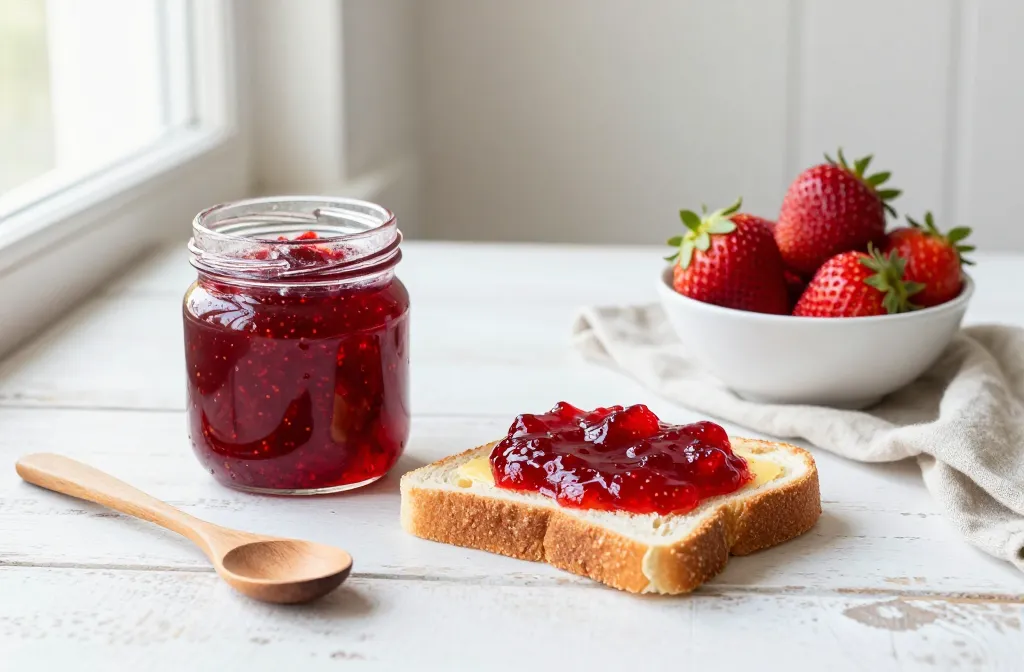
You don’t need a farm, a copper pot, or a Victorian kitchen to make incredible strawberry jam. You need strawberries, sugar, heat, and a tiny bit of patience. The payoff? That glossy, ruby spread that tastes like June on toast. Let’s make a batch you’ll want to eat with a spoon—no judgment.
Why Homemade Strawberry Jam Slaps
Homemade jam tastes brighter, fresher, and way less sugary than most store-bought options. You control the sweetness and texture, which means no weird aftertastes or mystery thickeners. Plus, the whole house smells like a strawberry festival—free aromatherapy, FYI.
Pick Your Strawberries Like a Pro
You want ripe, fragrant, slightly soft berries. Pale or firm strawberries might look cute, but they bring meh flavor. Also, smaller berries usually pack more punch than giant ones.
Fresh vs. Frozen
– Fresh berries? Amazing when they’re in season and sweet.
– Frozen berries? Totally valid. They’re picked at peak ripeness and taste excellent. Just thaw and drain off excess liquid unless you want jam soup.
How Many to Buy
Plan on about 2 pounds (900 g) of hulled strawberries for roughly 3 to 4 cups of finished jam. Got extra? Freeze them for your next batch or smoothie break.
Ingredients You Actually Need
Keep it simple. Classic jam doesn’t need 14 items and a ritual under the full moon.
- 2 pounds strawberries, hulled
- 1 to 1.5 cups sugar (adjust to taste; more sugar = thicker, sweeter jam)
- 2 tablespoons lemon juice (brightens flavor and helps set)
- Optional: 1 teaspoon lemon zest for extra zing
IMO: Start with 1.25 cups sugar for a balanced sweet-tart vibe. If you like a dessert-level jam, go 1.5 cups. If you’re sugar-shy, stick to 1 cup and cook a bit longer.
Your No-Fuss Method
You don’t need special pectin or a chemistry degree. Just follow the heat-and-stir approach and let the fruit do the work.
- Mash the berries: Toss strawberries in a wide pot with sugar and lemon juice. Mash with a potato masher until chunky. You want texture, not strawberry dust.
- Macerate (optional but gold): Let the mixture sit 15–30 minutes. Sugar draws out juice, which helps everything melt together.
- Boil like you mean it: Bring to a rolling boil over medium-high heat. Stir often so it doesn’t stick. Skim off the foam if it bugs you (it won’t hurt anything).
- Cook to the set point: Keep it at a strong boil 15–25 minutes. Stir more often near the end. You’ll see it thicken and darken slightly.
- Check the set: Use any of the tests below. When it passes, pull it off the heat.
- Jar it: Ladle into clean jars. Cool to room temp, then refrigerate. It thickens more as it chills.
How to Know When It’s Done
– Cold plate test: Chill a plate in the freezer. Drop a spoon of jam on it. Wait 30 seconds. Push it with your finger. If it wrinkles and holds a soft line, you’re good.
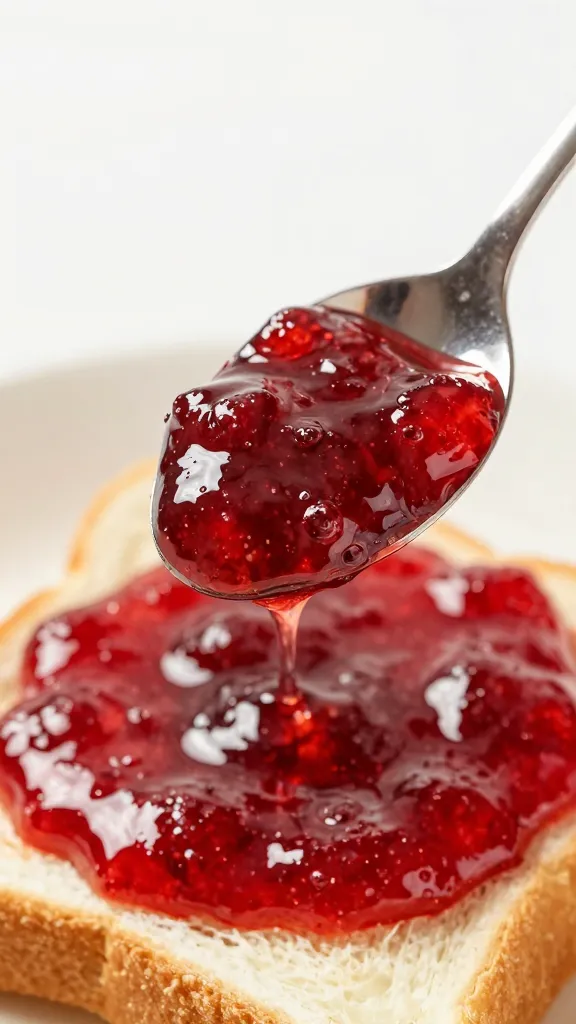
– Spoon test: Scoop some on a spoon and let it drip. If it falls in thick sheets instead of thin drips, it’s ready.
– Thermometer: Aim for around 220°F / 104°C at sea level. Higher altitudes need slightly lower temps.
Dial In Your Texture
Texture can make or break your jam, and everyone has opinions (loud ones).
Chunky vs. Smooth
– Chunky: Mash lightly and stop.
– Smoother: Hit it with an immersion blender for 10–15 seconds after cooking. Don’t over-blitz unless you want sauce.
Thick vs. Soft-Set
– Thicker jam: Use more sugar, cook longer, and pick slightly underripe berries (they have more natural pectin).
– Softer set: Use less sugar and cook just until it passes the plate test. Lovely for spooning over yogurt or ice cream.
Flavor Upgrades (When You Feel Fancy)
You don’t need them, but if you want to flex, try these.
- Vanilla bean or extract: Adds warmth and roundness.
- Balsamic vinegar (1–2 tsp): Deepens flavor, adds intrigue. No, it won’t taste like salad dressing.
- Black pepper (a pinch): Tiny heat that makes strawberries pop.
- Fresh herbs: Basil or mint at the end. Steep, then fish them out.
- Citrus zest: Lemon or orange zest for sparkle.
FYI: Add delicate flavors near the end to keep them bright.
Storage, Safety, and Shelf Life
If you plan to eat it within a few weeks, you can skip canning. If you want gifts or pantry stash, process the jars.
Short-Term (No Canning)
– Spoon hot jam into clean, warm jars.
– Cool to room temp, lid on, then refrigerate.
– Fridge life: 3–4 weeks.
– Freezer option: Freeze in freezer-safe jars with 1/2 inch headspace for up to 6 months.
Long-Term (Water-Bath Canning)
– Use sterilized jars, new lids, and follow safe canning guidelines.
– Fill jars leaving 1/4 inch headspace, wipe rims, apply lids and bands.
– Process in boiling water for 10 minutes (adjust for altitude).
– Cool 12–24 hours. Check seals before storing.
– Pantry life: Up to 1 year. Refrigerate after opening.
Important: Strawberry jam’s acidity is usually safe for water-bath canning when you include lemon juice. Don’t reduce the lemon if you plan to can.
Troubleshooting (Because Stuff Happens)
We all get a runny batch now and then. Doesn’t mean the jam police will show up.
My Jam Didn’t Set
– Chill it overnight; it often thickens.
– Re-cook with a squeeze more lemon and simmer 5–10 minutes.
– If you want insurance, add 1–2 teaspoons powdered pectin while reheating.
It’s Too Thick
– Stir in a few tablespoons of hot water or a splash of lemon juice, warm gently, and loosen it up.
It Tastes Too Sweet
– Brighten with extra lemon juice or zest.
– Serve with tangy yogurt or sharp cheese to balance.
It Scorched
– Don’t scrape the bottom. Pour the unburnt top layer into a new pot and keep going. Quietly pretend it never happened.
Serving Ideas That Aren’t Just Toast
I love bread as much as the next carb enthusiast, but jam does more.
- Yogurt swirls: Instant parfait energy.
- PB&J glow-up: Obvious, yes. Elite, also yes.
- Cheese board: Pair with brie, goat cheese, or sharp cheddar.
- Pancake topper: Warm it with a splash of water for syrup vibes.
- Jam cocktails: Shake a spoonful with gin, lemon, and ice. Thank me later.
FAQ
Do I need pectin for strawberry jam?
Nope. Strawberries contain some natural pectin, and lemon juice boosts it. A longer boil sets it nicely. If you prefer a very firm jam or you’re in a rush, you can add powdered pectin, but it’s optional.
Can I cut the sugar way down?
You can, but expect a softer set and a shorter fridge life. Sugar helps preserve texture and color. If you want low-sugar jam with a firmer set, use a low-sugar pectin and follow its instructions.
How do I avoid foam on top?
Foam forms during vigorous boiling. You can skim it, add a tiny pat of butter to reduce foaming (controversial but effective), or ignore it—it disappears when you stir jam after cooling. IMO, skimming takes 30 seconds and keeps things glossy.
Why did my jam turn dull or brownish?
Overcooking or too-high heat can darken the color. Use a wide pot for faster evaporation without scorching, stir often, and pull it right when it sets. A smidge of lemon juice helps maintain that bright red hue.
Can I double the recipe?
I wouldn’t. Larger batches take longer to gel and can overcook before they set. Make two back-to-back batches instead for better flavor and control. Your future self will approve.
What if I hate seeds and chunks?
Push the hot jam through a fine-mesh sieve to remove seeds and pulp. You’ll lose a bit of volume, but you’ll get a silky, almost jelly-like finish. Smooth operator status unlocked.
Conclusion
Strawberry jam doesn’t demand perfection—just good fruit, some sugar, and attention. Once you nail your preferred sweetness and texture, you can riff endlessly. Keep a jar in the fridge, share a few, and stash some in the freezer. And when winter hits and you crack one open? It’s summer on a spoon, IMO.