Monstera cuttings multiply like houseplant magic. You snip, you wait, and suddenly you’ve got new leaves unfurling like little green flags. Want that lush jungle look without buying another pricey pot?
You’ve got this. Here’s exactly how to propagate your Monstera—step by step, with zero fluff and no plant-gatekeeping.
Know Your Monstera: What You’re Actually Cutting
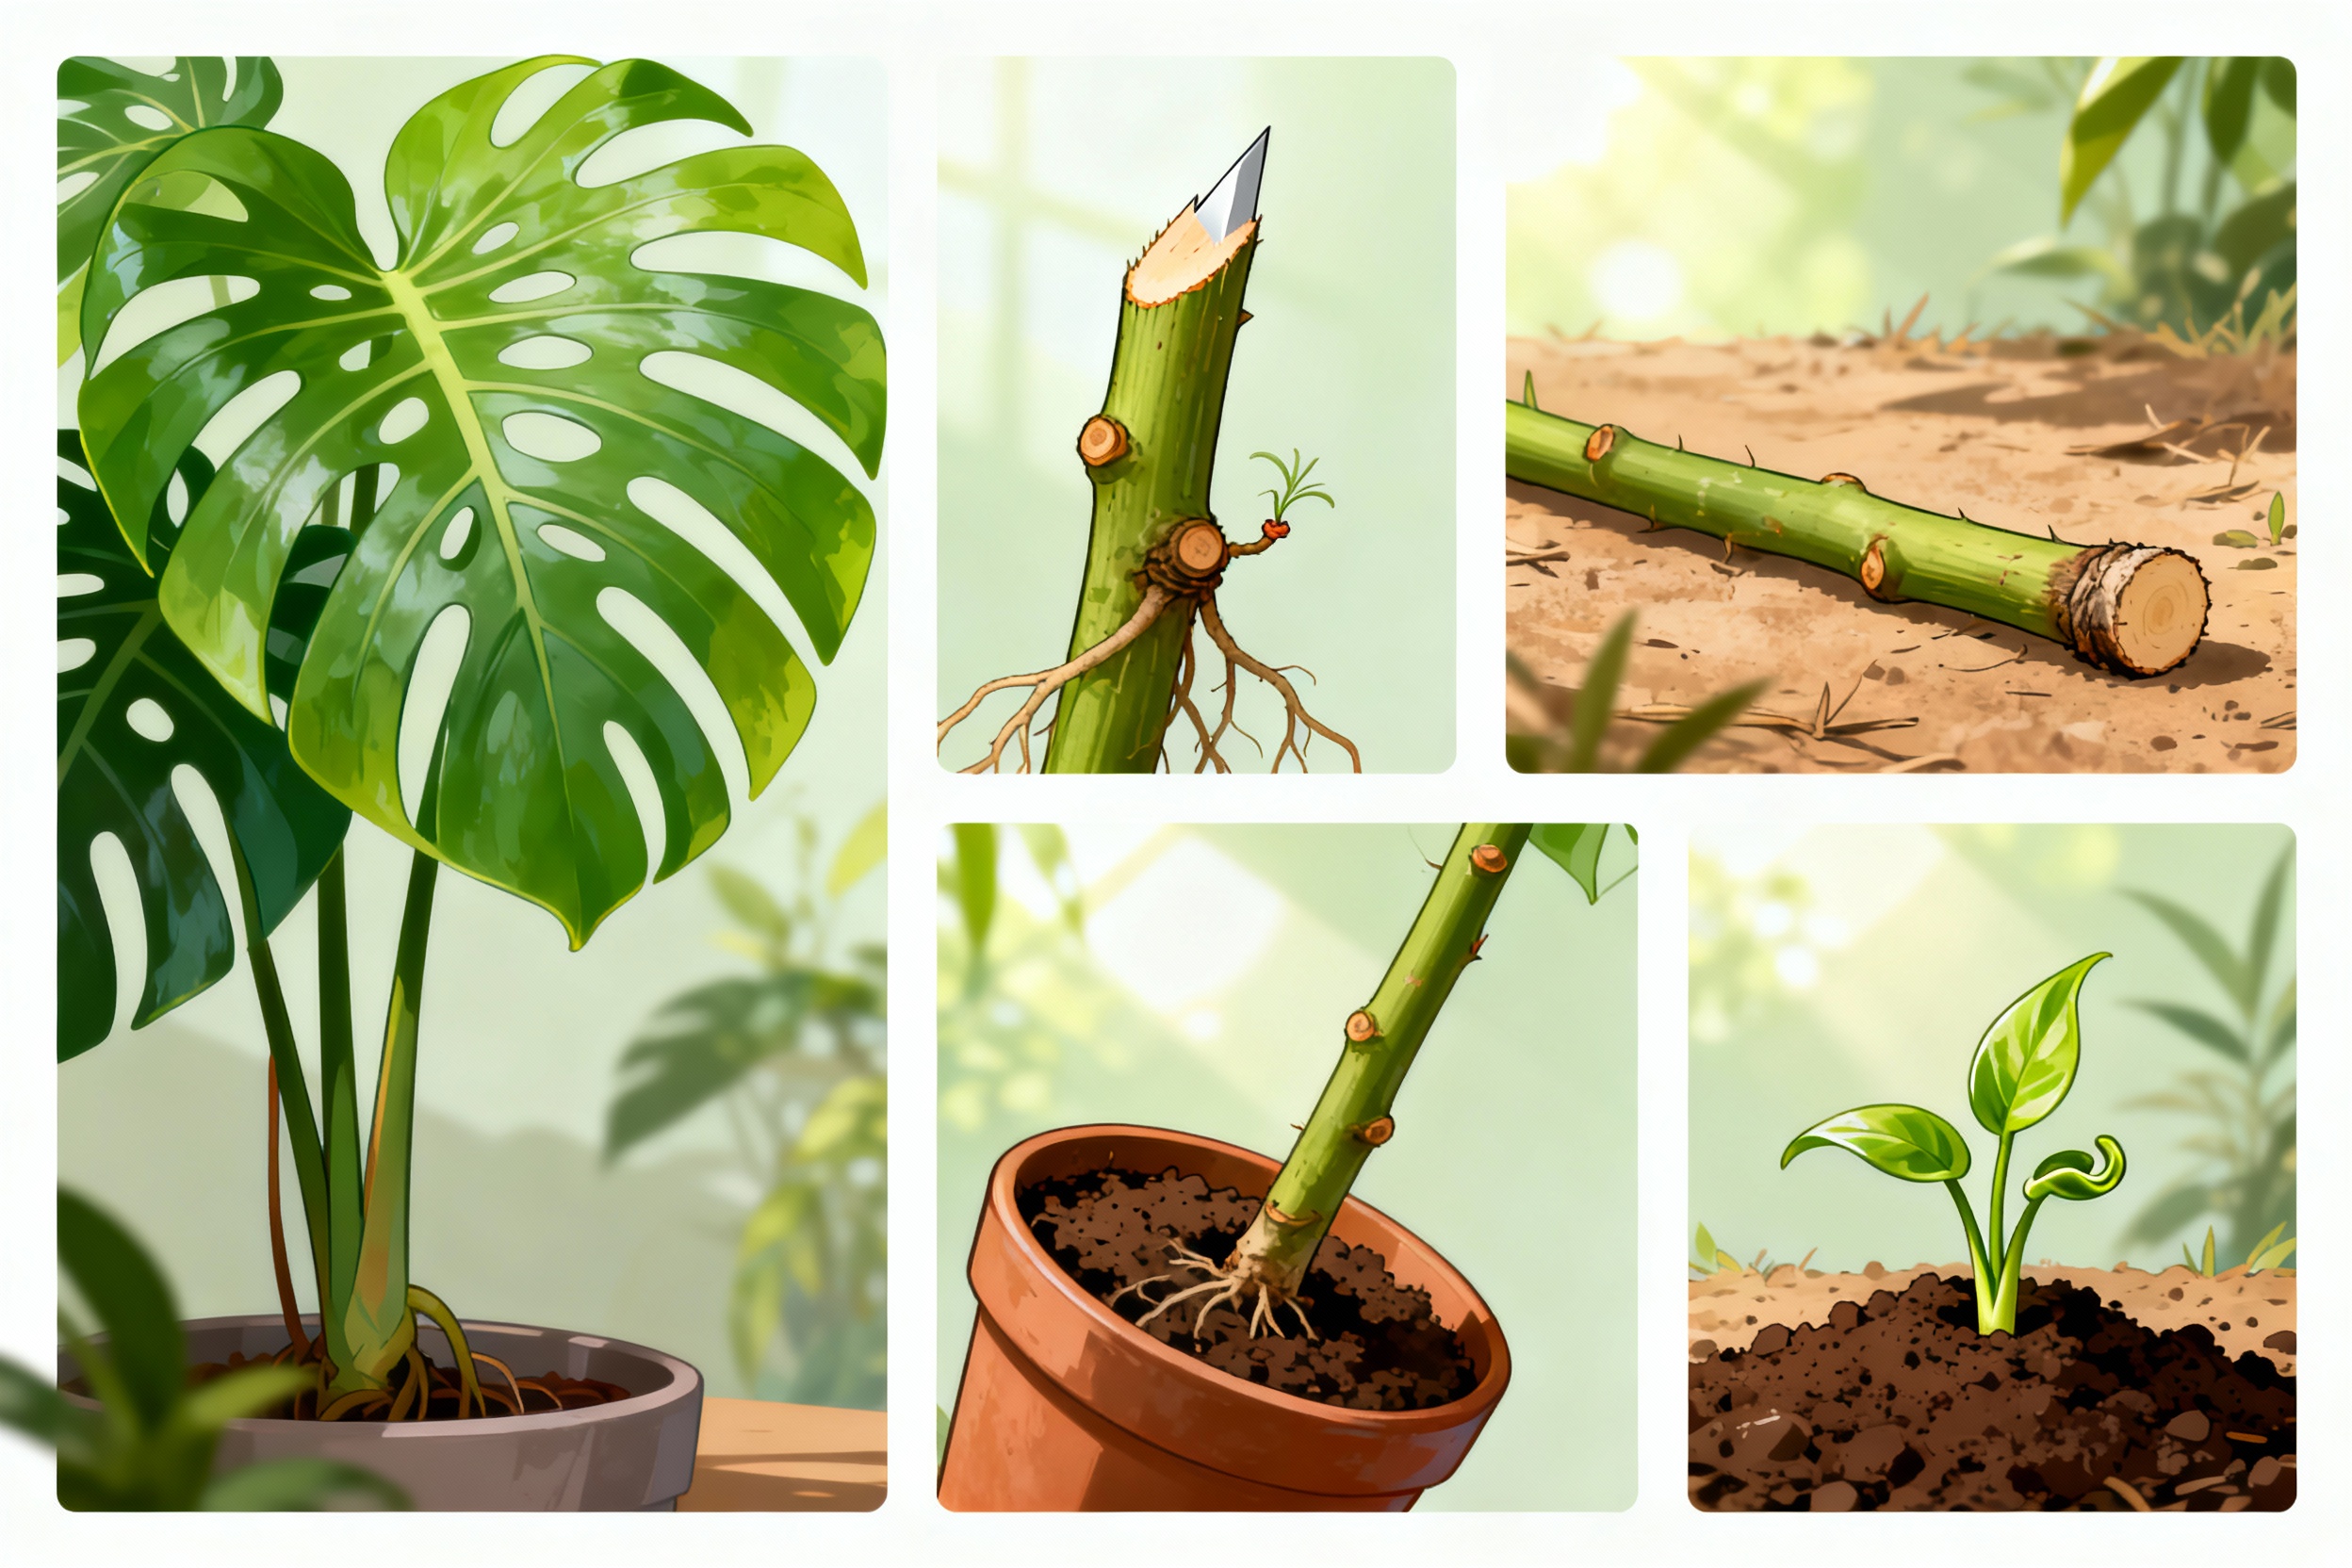
Monstera deliciosa (and cousins like adansonii) grow along vines. Each node holds the power—think of it as a tiny command center.
You’ll see nodes as bumps or rings on the stem, often with an aerial root poking out. Key tip: You need at least one node on your cutting, or it won’t root or grow leaves. A leaf without a node? Pretty, but basically a plant bookmark.
Node vs.
Aerial Root
– Node: The knobby section on the stem where leaves and roots emerge. Non-negotiable. – Aerial root: Brown/green root popping out of the node. Helpful but optional. – Internode: The smooth stem between nodes.
Don’t cut here unless you want disappointment.
Tools and Prep: Don’t Wing It
You don’t need a lab setup. You do need clean tools and patience. Here’s your mini checklist.
- Sharp scissors or pruning shears: Sterilize with rubbing alcohol or boiling water.
- Glass jar or vase: For water propagation (clear glass helps you spy on roots).
- Pot and soil: If you’re going straight to soil, use a chunky aroid mix.
- Optional: Rooting hormone, cinnamon (antifungal), and a clean rag.
Best Time to Propagate
Spring and early summer win.
The plant grows faster and bounces back quicker. You can propagate year-round, but winter cuttings move at sloth speed. FYI, bright warmth = happy roots.
Find the Perfect Cutting
Look for a healthy section with one or two leaves and at least one node.
Two nodes = faster rooting and more stability, but one works fine.
- Trace the stem from the tip back. Identify nodes and make sure you can fit clean cuts between them.
- Aim to cut half an inch below a node. That ensures you include the whole node and any baby aerial roots.
- Cut diagonally.
It increases surface area and helps prevent rot.
Don’t take weak or yellowing leaves. They drain the cutting’s energy. Go for firm, green leaves with no pest drama.
Water vs. Soil: Choose Your Adventure
Both methods work.
Pick the one that matches your patience level and setup.
Water Propagation
– Fill a jar with room-temp water. Let tap water sit for 24 hours to off-gas chlorine (IMO, this helps). – Remove any leaves that would sit underwater. Leaves + water = slime city. – Place the node and aerial root in the water.
Keep the leaf above the rim. – Put the jar in bright, indirect light. No harsh sun. Warm is good; sauna is not. – Change the water every 3–5 days.
If it looks cloudy or smells, change it ASAP. You’ll see roots in 1–3 weeks, depending on season and light. Wait until roots reach 2–3 inches long before potting.
Longer roots = easier transition.
Soil Propagation
– Mix a chunky aroid blend: 1/3 potting soil, 1/3 perlite or pumice, 1/3 orchid bark. Add a handful of charcoal if you’re fancy. – Dip the cut end in rooting hormone (optional but helpful). – Plant the node just below the surface, aerial root buried lightly. – Water to settle the mix, then let it dry out slightly. Keep the soil lightly moist, not soggy. – Provide strong indirect light and steady warmth.
Soil propagation skips the transplant shock. But you can’t watch the roots, which is less fun for the nosy plant parent.
Aftercare: Don’t Smother, Don’t Ignore
Your cutting needs consistency. Not coddling, but consistency.
- Light: Bright, indirect.
Think near a window with filtered light. No sunburns, please.
- Humidity: 50–60% is ideal. A pebble tray or grouping plants helps.
Avoid sealing the cutting in plastic unless you ventilate daily.
- Watering: In soil, water when the top inch dries out. In water, top off and refresh regularly.
- Fertilizer: Wait until you see new growth and a stable root system. Then feed at half-strength every 4–6 weeks during growing season.
Support matters: Monstera climbs.
Add a moss pole or stake early so you don’t wrestle a floppy vine later. Your future self will thank you.
Signs It’s Working
– White nubs or “root pimples” forming on the node – Fresh roots elongating and branching – New leaf or a swelling growth point
Red Flags
– Mushy, brown node = rot. Trim back to healthy tissue and restart. – Leaves drooping hard = low humidity or overwatering. – Zero progress after 6–8 weeks in warm months = low light or a bad cutting. Don’t panic-prune. Give it time.
Plants don’t rush for anyone.
Transplant Like a Pro (Water-to-Soil)
Rooted your cutting in water? Nice. Time to pot it up without stressing it out.
- Choose a pot with a drainage hole.
Size up only 1–2 inches larger than the root mass.
- Use a chunky mix (soil + bark + perlite). Monsteras hate compact, soggy soil.
- Plant gently. Spread the water roots out and cover with mix, but don’t bury the leaf base.
- Water thoroughly once.
Then let it dry slightly before the next drink.
- Keep it in the same light it had during propagation for a couple of weeks.
FYI: Water roots look thin and fragile. They adapt to soil in a few weeks. Expect a small pause in growth—totally normal.
Common Mistakes You Can Easily Dodge
– Cutting without a node: No node, no plant.
Period. – Overwatering in soil: “Moist” is not “marinating.” Let the top inch dry. – Too little light: Leggy, slow, sad. Bright indirect is the vibe. – Potting up too early: In water, wait for 2–3 inch roots. In soil, wait for resistance when you tug gently. – No support: You’ll get floppy growth that crawls instead of climbs.
Give it a pole, IMO.
Bonus: Propagating Different Monstera Types
Monstera Adansonii
Same node rules apply. It roots fast and loves humidity. It stays vining, so poles help if you want bigger leaves.
Variegated Monstera
Gorgeous but fussier.
Use bright, indirect light to preserve variegation. Avoid low-chlorophyll cuttings (all white) since they struggle to photosynthesize.
FAQ
How long does Monstera propagation take?
You’ll usually see roots within 2–4 weeks in warm, bright conditions. New leaves follow a few weeks after planting in soil.
Cooler rooms or low light can double that timeline, so don’t rage-quit.
Can I propagate a Monstera from just a leaf?
Nope. A leaf without a node won’t root or grow. It might look cute in a vase for a while, but that’s home decor, not propagation.
What water should I use for propagation?
Room-temp tap water works for most people.
Let it sit for 24 hours if your chlorine is strong. If your water runs very hard, filtered water can help keep roots cleaner, but it’s not essential.
Why are my cutting’s leaves yellowing?
Usually overwatering in soil, low light, or old leaves sacrificing themselves while the cutting roots. Trim yellow leaves if they’re fully spent and adjust light and watering.
When can I start fertilizing?
Wait until the cutting establishes in soil and pushes new growth.
Then feed at half-strength every 4–6 weeks during spring and summer. Skip winter feedings.
Do I need a moss pole?
You don’t need it, but your Monstera will produce bigger, fenestrated leaves if it climbs. Add a pole early to avoid a wrestling match later.
Wrap-Up: You’ve Got This
Propagation sounds technical, but it’s basically plant cloning with vibes.
Find a healthy node, pick water or soil, give it bright light, and stay patient. Soon you’ll hand out baby Monsteras like a green-thumbed Oprah. Go snip that vine and start your little jungle—your windowsill called, and it’s ready.