The start of a new school year feels like a freshly turned page. The air is crisp with possibility, your backpack is filled with pristine notebooks, and you have a brand-new canvas to express who you are. Just like carefully selecting the right plants to create a vibrant garden, choosing your daily look is an act of curation. Your personal style is your story, and your hair is the gorgeous, ever-changing frame for your face. It’s the first thing people notice and a powerful way to broadcast your mood, whether you’re feeling bold and brilliant or soft and studious.
But let’s be real—mornings are a mad dash. Between hitting snooze one too many times and grabbing a quick breakfast, who has time for a complicated hair routine? This is where smart styling comes into play. Think of it like good interior design: you want maximum impact with minimal fuss. The goal is to build a repertoire of go-to hairstyles that are not only beautiful but also practical, durable enough to last from first period to final bell, and quick enough to execute before you’ve even finished your first cup of coffee.
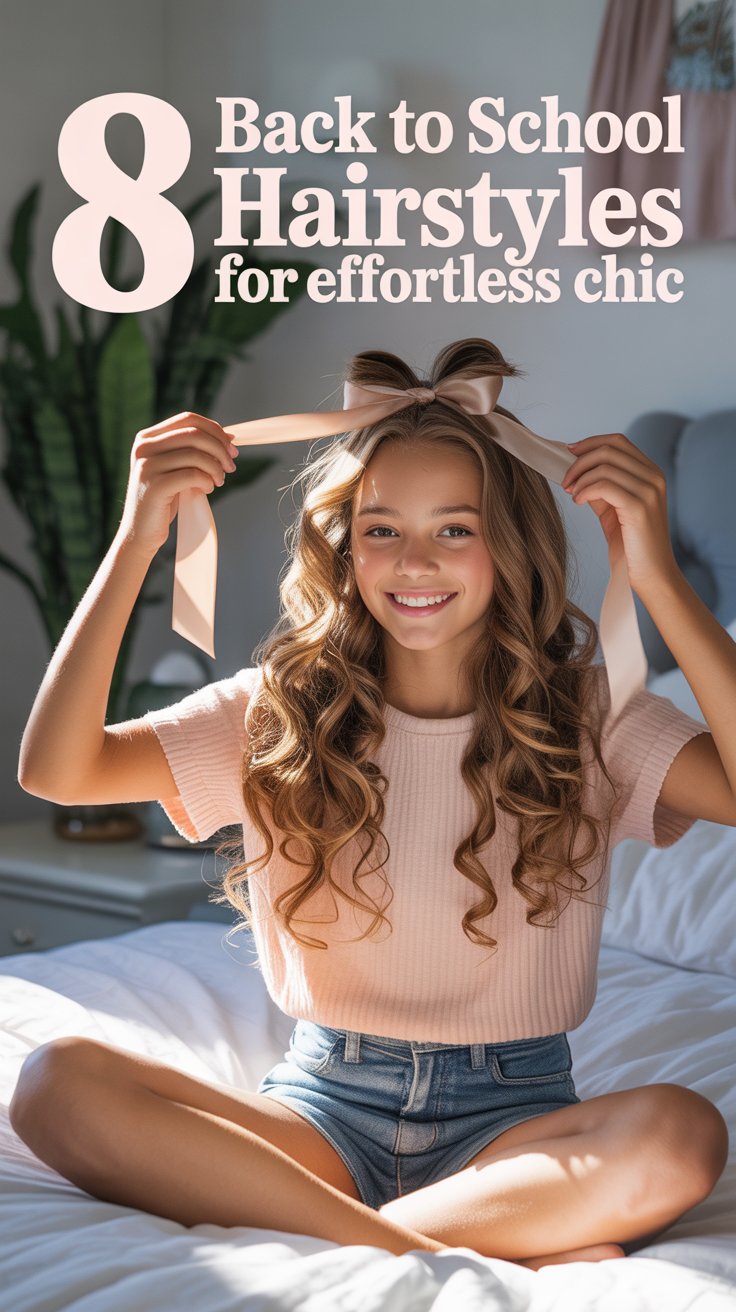
That’s exactly what this list is for. I’ve cultivated a collection of 8 stunning yet simple hairstyles perfect for the school year ahead. From polished looks that mean business to whimsical styles that show off your creative side, there’s something here for every hair type, length, and skill level. We’ll walk through each one step-by-step, with pro tips to help you personalize the look and make it last. Get ready to plant the seeds of style and watch your confidence blossom!
1. The Elevated Bubble Ponytail
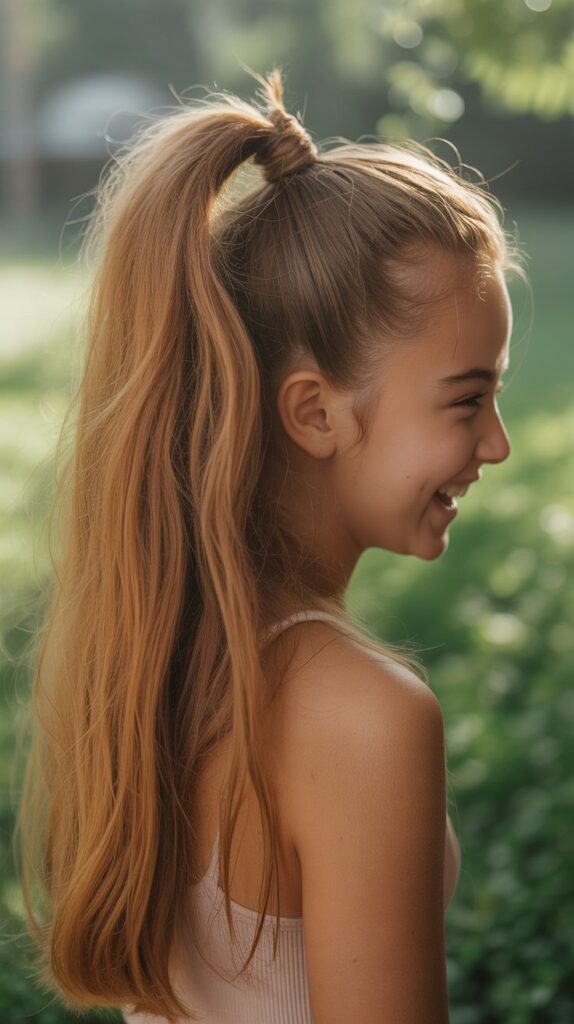
This isn’t your average gym class ponytail. The bubble ponytail adds a touch of architectural interest and playful rhythm to a classic style, making it look instantly more intentional and chic. It’s a fantastic way to control long hair, keeping it neat and tangle-free while still making a fashion-forward statement. Perfect for days when you have a presentation or just want to feel a little more put-together, this style works beautifully on medium to long hair and adds wonderful volume and texture.
How to Create It:
- Start by gathering your hair into a smooth ponytail at your desired height (high, mid, or low all work well) and secure it with a hair elastic.
- Move about two inches down the length of your ponytail and add another elastic.
- Gently pull and fluff the section of hair between the two elastics to create a rounded “bubble” shape. Don’t be afraid to gently tug it apart to create volume!
- Repeat this process down the entire length of your ponytail, spacing the elastics evenly until you have a few inches of hair left at the end.
Pro-Tips & Tricks: For a sleeker look, run a flat iron through your hair before you begin. To hide the elastics, take a tiny strand of hair from the underside of your ponytail and wrap it around the elastic, securing it with a bobby pin. Use colorful elastics to match your outfit or clear ones for a more seamless, grown-up vibe. A spritz of texturizing spray on the ponytail before you start will give the bubbles extra grip and volume.
2. The Polished Top Knot
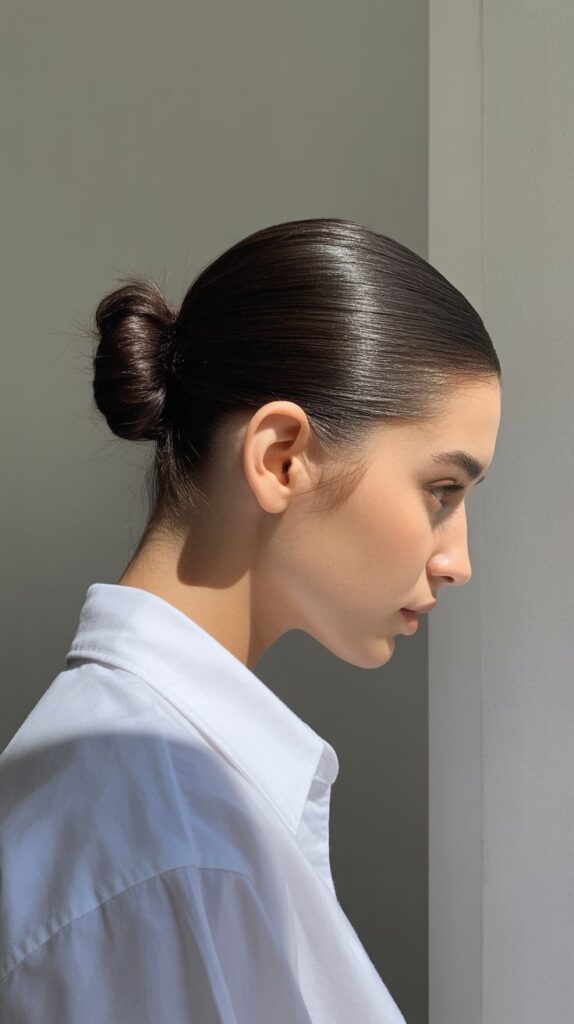
The top knot is the undisputed champion of “I need my hair out of my face” styles, but it doesn’t have to look like you just rolled out of bed. A polished top knot is sophisticated, elegant, and surprisingly simple to achieve. It’s the perfect hairstyle for exam days or intense study sessions, projecting an air of focused confidence. This style works for most hair lengths (as long as you can get it into a high pony) and is a brilliant way to manage second or third-day hair.
How to Create It:
- Brush your hair thoroughly to remove any tangles and gather it into a very high ponytail on the crown of your head. Secure it tightly with an elastic.
- Twist the ponytail from the base to the ends until it starts to coil around itself.
- Wrap the twisted coil around the base of the ponytail, forming a neat bun.
- Secure the bun firmly with bobby pins, tucking them underneath the knot to hide them. Use as many as you need to feel secure.
Pro-Tips & Tricks: For a fuller, more perfectly shaped bun, use a hair donut. Simply slide your ponytail through the donut, cover the donut with your hair, and secure it with another elastic before wrapping and pinning the ends. To tame flyaways and create a super-sleek finish, apply a small amount of hair gel or pomade with a clean toothbrush or spoolie around your hairline.
3. The Half-Up Dutch Braid Crown

Channel your inner romantic with this beautiful and practical hairstyle. A Dutch braid (which is like a French braid, but you cross the strands under instead of over) creates a gorgeous, pronounced plait that sits on top of the hair. Creating two of them to meet at the back of your head forms a crown that keeps the front sections of your hair perfectly in place while letting the rest flow free. It’s the perfect blend of bohemian charm and scholastic sensibility.
How to Create It:
- Create a center or side part. On one side, take a two-inch section of hair near your hairline.
- Split this section into three equal strands. Begin a Dutch braid by crossing the outer strands under the middle strand.
- As you continue braiding back towards the crown of your head, incorporate small sections of hair from along your hairline into the outer strands before you cross them under.
- Once the braid reaches the back-center of your head, stop adding new hair and finish with a regular three-strand braid for an inch or two, then secure with a small, clear elastic. Repeat on the other side.
- Join the two braids at the back of your head, removing the initial elastics and securing them together with a new elastic or some bobby pins for a seamless look.
Pro-Tips & Tricks: After the braids are secured, gently tug on the edges of the plaits to “pancake” them. This makes them look fuller, softer, and more voluminous. This style looks incredible on wavy or curly hair, so don’t worry about starting with perfectly straight locks. A little dry shampoo at the roots can add grip and make braiding easier.
4. Effortless Overnight Heatless Curls
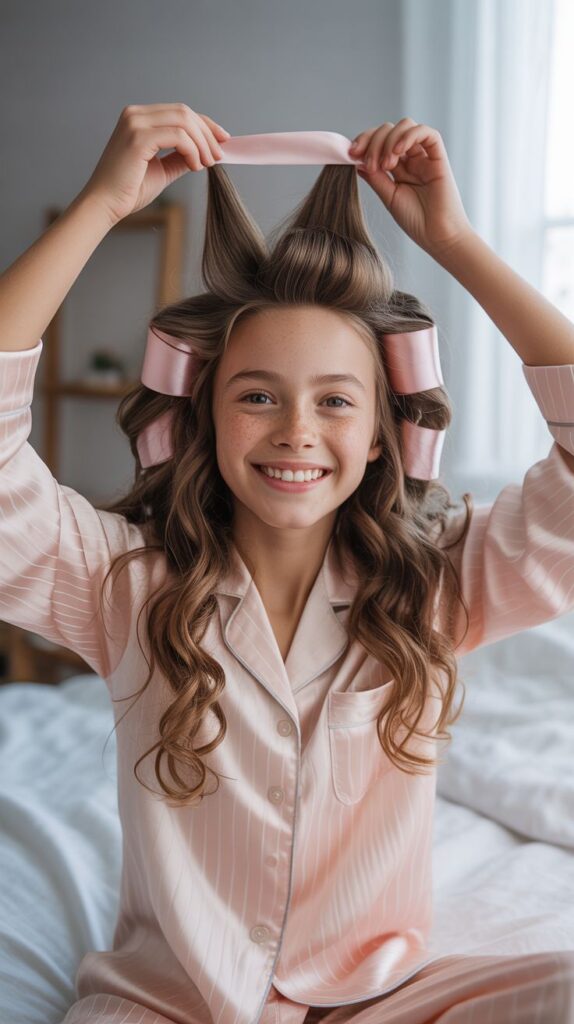
Imagine waking up with perfectly styled hair. It’s not a dream—it’s the magic of heatless curls! This technique is a game-changer for busy school mornings and is so much healthier for your hair than using hot tools every day. Using a silk or satin curling ribbon (or even the belt from a fluffy robe), you can create beautiful, bouncy curls while you sleep. You’ll wake up ready to go, saving precious time and protecting your hair from damage.
How to Create It:
- Start with slightly damp, towel-dried hair. Part your hair down the middle.
- Place the heatless curling ribbon over the top of your head like a headband, securing it on one side with a claw clip to hold it in place.
- On the other side, take a small section of hair from the front and wrap it away from your face, going over and around the ribbon.
- As you bring that strand back to the front, pick up a new section of hair, join it with the first, and wrap them both around the ribbon together.
- Continue this process, adding more hair with each wrap, until all the hair on that side is wrapped around the ribbon. Secure the end with a scrunchie. Repeat on the other side, then remove the claw clip. For best results, sleep on it overnight. In the morning, gently unwrap your hair and shake out the curls.
Pro-Tips & Tricks: Use a light-hold mousse or styling cream on your damp hair before wrapping to help the curls set and last longer. The tightness of your wrap will determine the tightness of the curl. For looser, beachy waves, wrap more loosely. For tighter curls, wrap snugly. A silk pillowcase can also help reduce frizz while you sleep.
5. The Scarf-Woven Ponytail
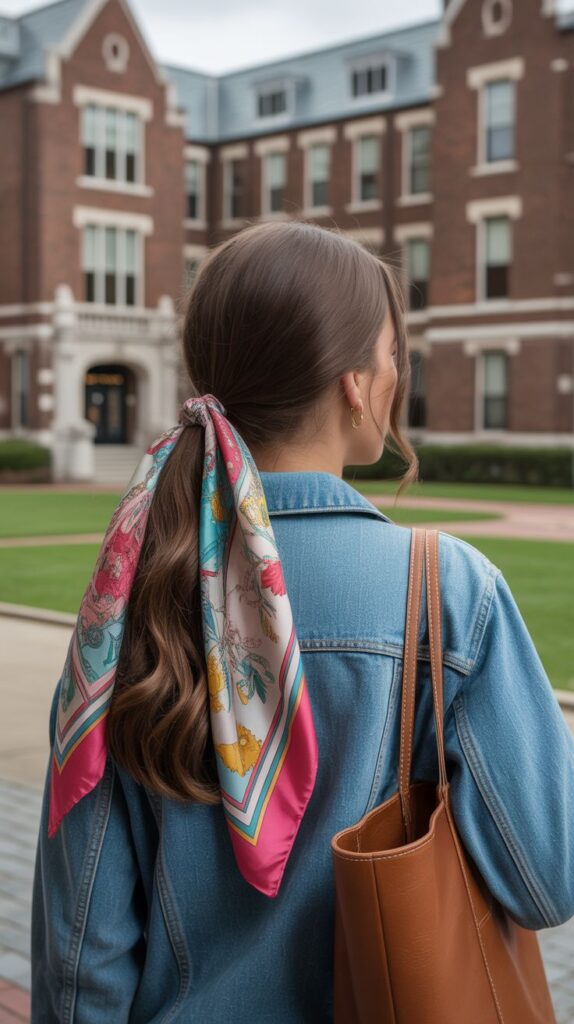
Accessories are the secret weapon of any style enthusiast, and a simple silk or cotton scarf can transform a basic ponytail into a work of art. This look injects personality, color, and a touch of vintage flair into your hairstyle. It’s an amazing way to coordinate your hair with your outfit or show off school spirit with a scarf in your school’s colors. This is interior design for your hair—using a statement piece to define the space.
How to Create It:
- Gather your hair into a ponytail at your preferred height and secure it with a hair elastic.
- Take a long, thin scarf and fold it in half. Loop it through the top of your hair elastic, so the two ends hang down evenly with your ponytail.
- Divide your ponytail into two sections.
- Perform a simple three-strand braid, using one section of hair, the second section of hair, and the two tails of the scarf as your three “strands.”
- Braid down until you have a few inches of hair left, then secure the end of the braid with a clear elastic. You can also tie the scarf ends into a bow over the elastic.
Pro-Tips & Tricks: You can also simply tie the scarf in a bow around the base of a regular ponytail for a quicker version of this style. Choose a scarf material that has a little bit of grip—pure silk can be slippery, while a cotton blend or a jacquard silk will hold better. Don’t have a scarf? A long ribbon works just as well!
6. The Simple Twisted Half-Up
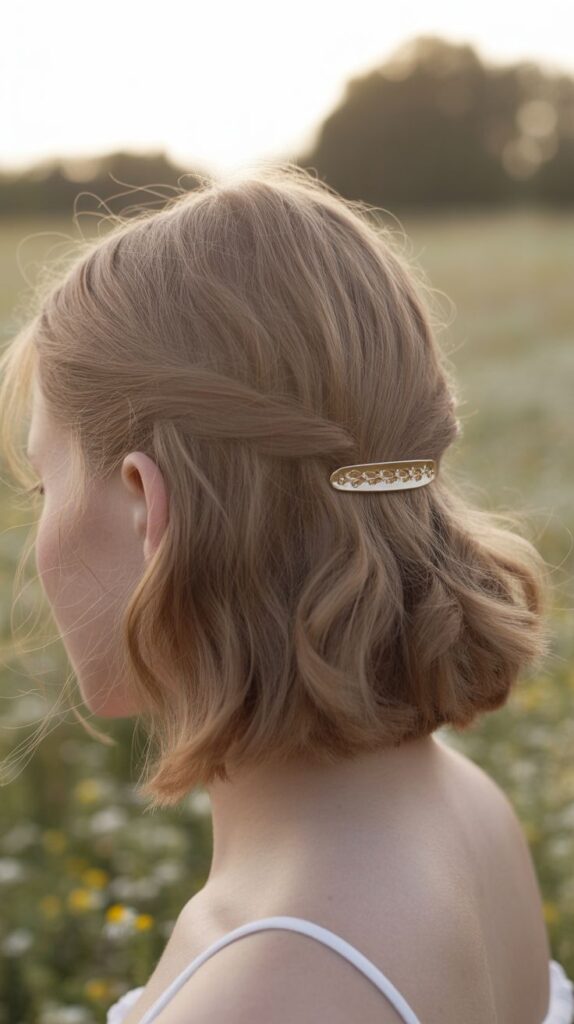
When you have literally two minutes, this is your go-to style. The twisted half-up looks elegant and intricate, but it’s one of the easiest hairstyles to master. It’s perfect for keeping hair out of your eyes during class while still looking polished and feminine. This versatile look works on almost any hair length, from a bob to long locks, and on any texture, from straight to curly. It’s the definition of low-effort, high-reward.
How to Create It:
- Take a one-to-two-inch section of hair from one side of your head, right by your temple.
- Twist this section away from your face until you reach the back of your head. Hold it in place with one hand or a temporary clip.
- Repeat on the other side, taking a section of the same size and twisting it away from your face.
- Bring both twists to meet in the middle at the back of your head. Secure them together with a clear elastic or a few crisscrossed bobby pins. For extra security, slide the bobby pins into the twist against the scalp.
Pro-Tips & Tricks: Before you secure the twists, gently pull on the individual loops of the twist to add volume and a softer, more romantic look. Elevate the style by covering the elastic with a cute barrette, a small bow, or a decorative clip. A spritz of light-hold hairspray will keep everything in place all day.
7. The Casual Side Fishtail Braid

The fishtail braid has an intricate, woven appearance that looks like it took ages to create, but it’s surprisingly methodical and easy once you get the hang of it. Worn casually over one shoulder, it has a cool, relaxed vibe that’s perfect for a creative class like art or drama. It’s also incredibly durable and tends to look even better as it gets a little messier throughout the day, making it a fantastic low-maintenance option.
How to Create It:
- Sweep all of your hair over to one shoulder.
- Divide your hair into two large, equal sections.
- Take a small piece of hair (about half an inch) from the outside of the left section. Cross it over the top and add it to the inside of the right section.
- Now, take a small piece from the outside of the right section. Cross it over the top and add it to the inside of the left section.
- Repeat this pattern—outside left to inside right, outside right to inside left—all the way down your hair. Secure the end with an elastic.
Pro-Tips & Tricks: The smaller the pieces you cross over, the more intricate and detailed your fishtail will look. Once the braid is complete, gently pull it apart with your fingers to create a fuller, thicker, more “undone” look. Don’t worry about perfection; a few loose strands only add to its charm.
8. The Accessorized Headband Tuck

This hairstyle is pure genius for short to medium-length hair, but works on long hair, too! It’s a chic, almost Grecian-inspired look that appears incredibly complicated but is deceptively simple. All you need is a stretchy headband. It keeps every last strand of hair off your neck and out of your face, making it perfect for PE class, science labs, or just a warm day. It’s a full updo without a single bobby pin.
How to Create It:
- Place a stretchy, elasticated headband over your head, positioning it across your forehead or on top of your hair like a traditional headband, depending on the look you want.
- Starting with a section of hair near your face, lift it up and tuck it down and around the headband in the back.
- Take the next section of hair and do the same thing, tucking it up and around the band.
- Continue this process, working your way around your head until all of your hair is tucked securely into the headband, creating a lovely rolled shape at the nape of your neck.
Pro-Tips & Tricks: This style works best with a headband that has good grip and isn’t too slippery. A little texturizing spray or dry shampoo will give your hair the grit it needs to stay tucked all day. You can leave a few face-framing tendrils out at the front for a softer look. Choose a decorative headband to make it a real statement piece!