You brought home a pocket full of seashells. Now your car smells like low tide, and those once-sparkly spirals look a little… haunted. Good news: cleaning shells isn’t hard, and you can make them shine without ruining their natural charm. Grab a few basics, cue your favorite playlist, and let’s give those ocean treasures a glow-up.
Know Your Shells Before You Scrub
Not all shells like the same spa treatment. Some hold up to scrubbing; others chip if you look at them wrong. Quick ID goes a long way.
- Heavier, glossy shells like conchs and whelks handle more aggressive cleaning.
- Delicate, chalky shells (think sand dollars, urchins) need gentle, low-drama care.
- Color and pattern sometimes fade with harsh chemicals. If you love a shell’s natural tint, avoid strong acids.
Smell Test = Treatment Plan
If a shell smells like a fish market at noon, there’s still organic matter inside. You’ll need to remove that gunk before anything else. If it just looks dusty or sandy, congrats—you’re already halfway to pretty.
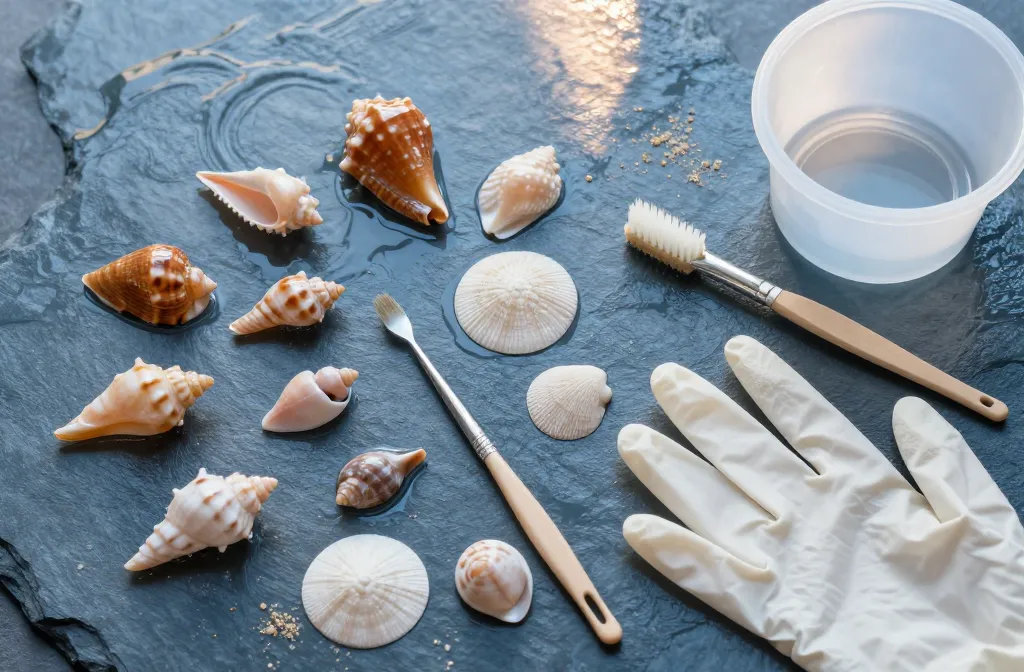
Gear Up: Simple Supplies That Work
You don’t need a lab. You probably own most of this stuff.
- Soft brushes: old toothbrush, paintbrush for delicate pieces
- Containers: plastic tubs or bowls you don’t mind getting gross
- Gloves: because stinky shell goo is a vibe killer
- Mild dish soap and warm water
- White vinegar (optional; use with care)
- Baking soda for smell control
- Hydrogen peroxide (3%) for gentle disinfecting and whitening
- Mineral oil or baby oil for that final glow
- Tweezers or a skewer to pull out stubborn bits
- Paper towels and a soft cloth
FYI: Skip bleach. It can make shells brittle and chalky, and the fumes aren’t cute.
Step-by-Step: From Sandy to Stunning
Let’s get practical. Here’s the baseline method that works for most shells.
- Rinse first. Swish shells in cool water to knock off sand and loose debris. No scrubbing yet.
- Soak in soapy water. Fill a tub with warm water and a few drops of dish soap. Soak 30–60 minutes.
- Brush gently. Use a toothbrush to clean grooves and ridges. Work slowly, don’t gouge the surface.
- Deal with the stink. If a shell still smells or you see dark, squishy stuff inside, use tweezers to remove it. Rinse and repeat the soak if needed.
- Disinfect and brighten. For lingering odors or light stains, soak in 3% hydrogen peroxide for 10–20 minutes, then rinse well.
- Dry completely. Lay shells on paper towels in a warm, ventilated area. Let them dry for several hours or overnight.
- Finish with oil. Rub a drop of mineral oil onto each shell to revive color and shine. Buff with a soft cloth.
Pro tip: If anything feels gritty or resists your brush, stop and re-soak. Water does the heavy lifting.
When Vinegar Helps (and When It Ruins Everything)
Vinegar can dissolve mineral crusts and barnacles—but it also dissolves the shell itself, because shells contain calcium carbonate. So yeah, vinegar is both hero and villain.
Smart Vinegar Use
- Test first. Dip a cotton swab in vinegar and dab a hidden spot for 10 seconds. If it fizzes like soda, proceed very carefully—or don’t.
- Short soaks only. If you go for it, soak for 30–90 seconds, tops. Watch closely.
- Neutralize after. Rinse, then swish in a baking soda solution (1 tablespoon per cup of water) to stop any leftover acid action. Rinse again.
Skip Vinegar For
- Delicate, thin, or chalky shells
- Shells with gorgeous color you want to keep (vinegar can dull or bleach patterns)
IMO: If the shell looks nice already, don’t gamble. Use peroxide or just elbow grease.
Special Cases: Sand Dollars, Urchins, and Starfish

These beach babes break if you sneeze too hard. Handle with care.
Sand Dollars
- Rinse gently to remove sand. Don’t scrub—ever.
- Peroxide bath for whitening: 3% hydrogen peroxide for 10–15 minutes. It’ll fizz and lift gunk.
- Harden with glue mix: 1 part white school glue to 1 part water. Brush on both sides and let dry. This keeps them from crumbling.
Sea Urchin Tests (Empty Shells)
- Remove spines only if they fall off naturally; forcing them creates bald patches.
- Peroxide soak 10–20 minutes. Rinse well.
- Strengthen with a light glue-and-water wash if the shell feels fragile.
Starfish (Dried Specimens)
- Do not soak. They get mushy and stink up your soul.
- Freeze to de-bug for 48 hours in a sealed bag if you worry about pests.
- Deodorize by sealing in a container with baking soda for a few days.
Removing Barnacles, Algae, and Mineral Crust
Barnacles cling like an ex who won’t return your hoodie. You need a mix of patience and the right tools.
- Plastic scraper or old credit card for gentle prying. Work at an angle, not straight on.
- Wooden skewer for tight grooves. Avoid metal—it scratches fast.
- Peroxide soak softens algae and light crusts. Vinegar for brief touch-ups if safe (see earlier rant).
- Repeat cycles: soak, scrape, rinse. Rushing cracks shells.
Stubborn Stains
Try a paste: baking soda + a few drops of water. Rub lightly with your fingertip, then rinse. It’s barely abrasive and won’t massacre the surface.
Make Them Display-Ready
Your shells deserve better than a dusty bowl in a dark corner. A few small upgrades go a long way.
- Polish thoughtfully: A whisper of mineral oil revives colors. Too much looks greasy and attracts dust.
- Label the memory: Tiny tags with location and date make your collection feel curated, not hoarded.
- Choose light, not heat: Display near indirect light. Direct sun fades pigments over time.
- Shadow boxes or trays protect fragile pieces and keep cats from “rearranging.”
Storage Tips
- Wrap delicate shells in tissue or bubble wrap.
- Use breathable containers: cardboard or fabric bins beat sealed plastic for long-term storage.
- Add baking soda sachets to keep musty smells away.
Eco and Legal Stuff (Because We Like Oceans)
You can love shells and still respect the beach. Small choices matter.
- Check local rules. Some beaches ban collecting live shells, sand dollars, or urchins.
- Leave live occupants alone. If it crawls, wiggles, or slurps, it stays.
- Take only a few. You don’t need 37 identical clamshells. Promise.
- Rinse on-site with ocean water to release stowaway critters before you head home.
FYI: Removing too many shells can affect beach ecosystems. Let the hermit crabs have some real estate.
FAQ
Can I boil shells to clean them?
You can, but I don’t recommend it. Boiling can crack shells, set smells deeper, and sometimes releases a funk you’ll never forget. Warm soapy soaks and peroxide work better and keep colors intact.
Why do my shells look dull after cleaning?
Natural shells often dry to a matte finish. For a gentle glow-up, rub a tiny bit of mineral oil, then buff. If they still look chalky, you may have overused vinegar or bleach—go easy next time.
How do I get rid of that fishy odor for good?
Remove all organic bits, then soak in 3% hydrogen peroxide for 10–20 minutes. Rinse and dry completely. If any smell lingers, seal the shells in a box with baking soda overnight. That usually does the trick.
Is bleach ever okay for shells?
Short answer: I vote no. Bleach weakens shells and can bleach out patterns you actually want. Peroxide cleans and deodorizes without wrecking the structure, IMO.
Will oil attract dust or yellow over time?
A light application won’t cause problems. Use a drop, buff well, and reapply only when colors fade. If you go heavy, yes—dust sticks, and some oils can yellow. Mineral oil stays stable longer than vegetable oils.
What if I find a shell with a critter inside?
Put it back in the water and wish it well. If you already brought it home and realize it’s occupied, return it to the sea ASAP if possible. No cleaning hack replaces a living home.
Conclusion
Cleaning shells doesn’t require wizardry—just patience, a toothbrush, and smart choices. Start gentle, escalate carefully, and protect those fragile stunners with glue or a light polish when needed. Treat the ocean’s leftovers with respect, and your collection will look amazing without losing its story. Now go make that windowsill look like a tiny beach—minus the smell.