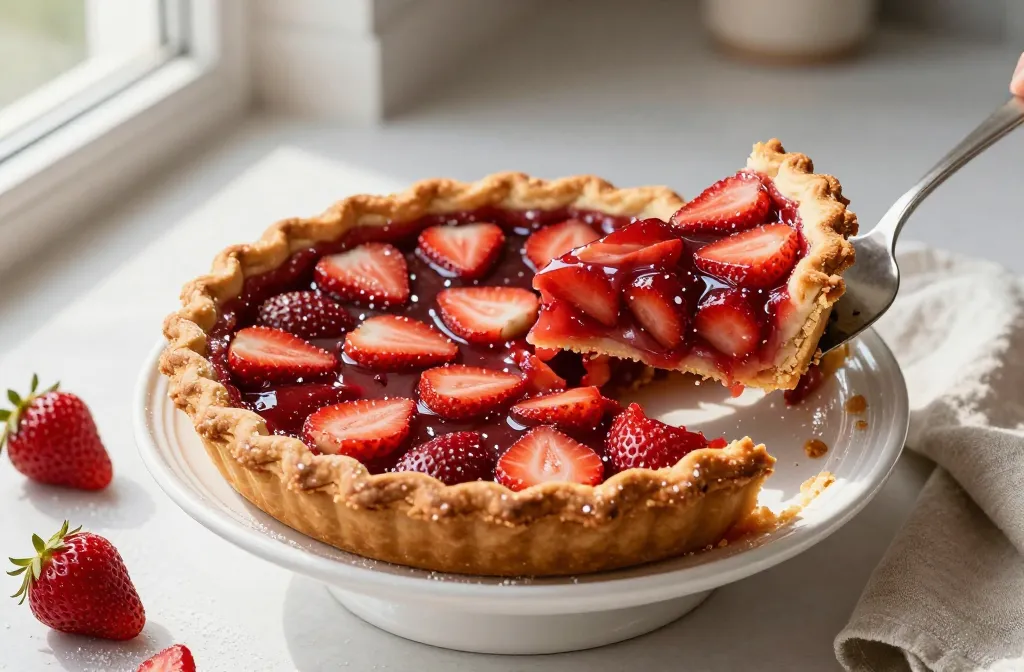
Strawberry pie doesn’t ask for much—just juicy berries, a flaky crust, and a little sugar-fueled confidence. It screams summer even if you bake it in February with the windows closed and a hoodie on. You’ll get bright flavor, glossy slices, and that sparkle of “I totally made this” when you set it on the table. Ready to turn strawberries into pure joy?
Why Strawberry Pie Works (and When It Doesn’t)
Strawberries shine because they’re naturally sweet and a little tart. A great pie balances those two and keeps the filling set but not rubbery. Sound simple? It can be—if you respect a few rules.
Common fails happen when berries release too much juice, the crust goes soggy, or the filling refuses to set. We’ll dodge those with a thickener that actually works, a pre-baked crust, and a chill time you won’t want to skip (sorry, not sorry).
What You’ll Need
For the crust (9-inch pie):
- 1 1/4 cups all-purpose flour
- 1/2 cup cold unsalted butter, cubed
- 1 tablespoon sugar
- 1/2 teaspoon salt
- 3–5 tablespoons ice water
For the filling:
- 6 cups fresh strawberries, hulled (about 2 pounds)
- 3/4 cup granulated sugar (adjust to taste)
- 1/4 cup cornstarch (or 1/3 cup if berries seem very juicy)
- 1 tablespoon lemon juice
- 1 teaspoon lemon zest (optional but recommended)
- 1 teaspoon vanilla extract
- Pinch of salt
For finishing:
- 1 egg, beaten with 1 teaspoon water (for crimp gloss, optional if doing a lattice)
- Coarse sugar for sprinkling (optional)
- Whipped cream or vanilla ice cream, for serving
Two Ways to Pie: Baked vs. No-Bake
You’ve got options, and both slap (IMO).
The classic baked strawberry pie
This route cooks the berries in the crust. You’ll get a jammy texture and deep flavor. It slices cleanly and tastes like summer decided to caramelize a little.
The fresh (no-bake) strawberry pie
You’ll blind-bake the crust, then fill it with fresh berries coated in a quick stovetop glaze. It’s glossy, vibrant, and a little less sweet. It also screams “I’m fancy” without asking for much effort.
Step-by-Step: Flaky Crust, Zero Stress
Let’s not fear the crust. We’re doing science, but with butter.
- Whisk dry stuff: Stir flour, sugar, and salt in a bowl.
- Cut in butter: Rub butter into flour with fingertips or a pastry cutter until pea-sized bits remain. Keep the butter cold—like, arctic.
- Add water: Drizzle in ice water, 1 tablespoon at a time, mixing until the dough just clumps. If it holds when you squeeze it, you nailed it.
- Chill: Form a disk, wrap, and chill 45–60 minutes. Don’t skip—gluten needs a timeout.
- Roll and fit: Roll into a 12-inch circle, fit into a 9-inch pie plate, and trim. Crimp edges if you’re feeling extra.
- Blind-bake: Dock the base with a fork, line with parchment, fill with pie weights (or dried beans), and bake at 400°F (205°C) for 15 minutes. Remove weights and bake 8–10 more minutes until lightly golden. For a baked pie, par-bake only (lightly golden). For a no-bake pie, bake to fully golden.
Pro crust tips
- Keep everything cold. Warm butter equals tough crust. We don’t do that here.
- Don’t overwork the dough. Visible butter bits = flaky layers. Science, but delicious.
- Use a glass or light-colored metal pan. You’ll see color and avoid burnt bottoms.
Method 1: Baked Strawberry Pie
This gives you a classic, sliceable pie with a soft-set filling.
- Prep the berries: Slice half the strawberries. Quarter the rest for texture.
- Mix the filling: In a bowl, combine sugar, cornstarch, salt, lemon juice, zest, and vanilla. Fold in berries until coated. Let sit 10 minutes so the sugar pulls some juice—think flavor pregame.
- Fill and top: Pour into your par-baked crust. If you want a lattice top, make a second crust, weave strips, brush with egg wash, and sprinkle coarse sugar. If not using a top, dot with a tablespoon of butter for extra sheen (optional).
- Bake: 375°F (190°C) for 35–45 minutes, until the filling bubbles in the center and the crust looks golden. Bubbles mean the cornstarch activated and thickened—no bubbles, no set.
- Cool completely: Let it sit 3–4 hours. I know. But if you cut it early, it’ll slouch everywhere like a teen at dinner.
Texture tweaks
- Softer set: Use 3 tablespoons cornstarch.
- Ultra clean slices: Go up to a packed 1/4 cup plus 1 teaspoon cornstarch and chill after cooling.
Method 2: Fresh No-Bake Strawberry Pie
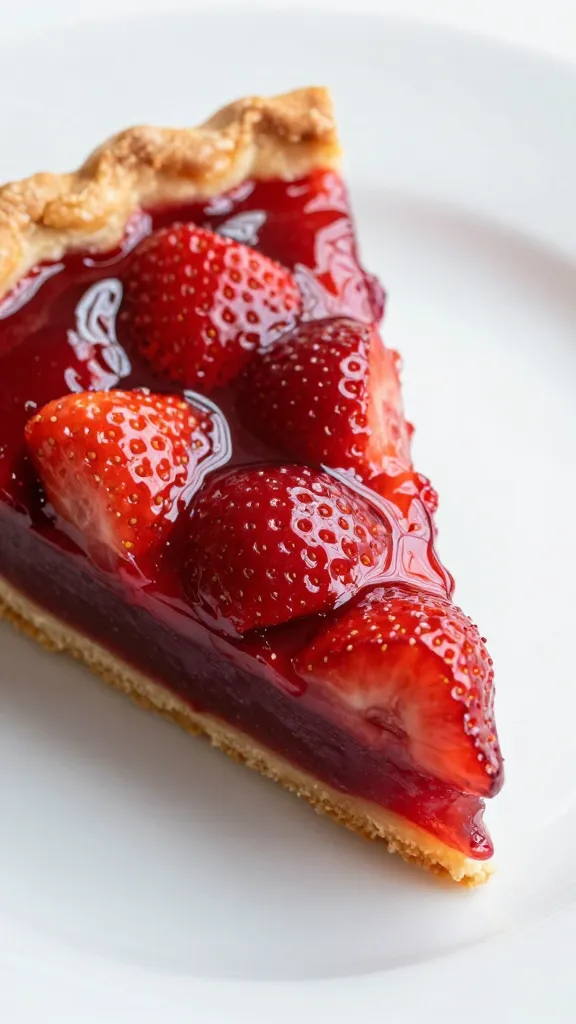
Bright, juicy, and glossy—like a magazine cover, but edible.
- Make the glaze: Mash 1 1/2 cups of strawberries in a saucepan. Add sugar, cornstarch, lemon juice, and salt. Cook over medium, stirring, until thick and glossy (about 3–5 minutes). Remove from heat, stir in vanilla, and cool to just warm.
- Assemble: Arrange whole or halved berries in your fully baked crust. Pour the warm glaze over and gently toss with a spatula to coat evenly.
- Chill: Refrigerate 2–3 hours until set. Serve with whipped cream because you’re not a monster.
Why this works
- Fresh flavor. Most berries stay uncooked, so they pop.
- Firm set. The glaze locks everything in place.
- Speedy. Faster than baking, especially if you have a pre-made crust (no judgment).
Make It Your Own
You’re the boss. I’m just here cheering with a spatula.
- Flavor boosts: Add 1–2 teaspoons balsamic vinegar or 1 tablespoon chopped basil to the filling. Sounds weird; tastes luxe.
- Sweetness control: Taste your berries first and adjust sugar up or down by 2–3 tablespoons. FYI, supermarket berries in winter will want more sugar.
- Thickeners: Prefer tapioca? Use 3 tablespoons instant tapioca for the baked version. It sets clear and lovely.
- Crust swap: Graham cracker crust tastes amazing with the no-bake method. Mix 1 1/2 cups crumbs, 1/3 cup sugar, and 6 tablespoons melted butter; press and bake 8 minutes at 350°F (175°C).
- Glaze hack: For gloss, gently warm 2 tablespoons strawberry jam and brush over the top after baking. Instant bakery vibes.
Serving, Storing, and Not Screwing It Up
Serve slices slightly chilled or at cool room temp. Dollop whipped cream, drizzle a little cream, or go full send with vanilla ice cream. IMO, a pinch of flaky salt on top wakes everything up.
Store leftovers covered in the fridge for up to 2 days (no-bake) or 3 days (baked). The crust softens over time, so invite friends or just eat pie for breakfast. It’s fruit. It’s practically salad.
FAQ
How do I keep the crust from getting soggy?
Blind-bake it until golden and let it cool before adding filling. For extra armor, brush the warm crust with a thin layer of beaten egg white or a spoonful of melted white chocolate. It creates a moisture barrier and keeps things crisp.
Can I use frozen strawberries?
You can, but use the baked method only. Thaw and drain them well, then increase cornstarch by 1 tablespoon because frozen berries release more juice. The no-bake version wants firm, fresh berries for structure.
What if my filling didn’t set?
You probably pulled it before the center bubbled (for baked) or didn’t chill long enough (for no-bake). Let baked pies cool fully, then chill 1 hour if needed. For no-bake, give it at least 3 hours. Worst case, call it a “strawberry crumble” and pretend it was on purpose.
How sweet should I make it?
Taste your berries. If they’re super ripe and fragrant, stick to the base sugar amount or even reduce by 2 tablespoons. If they’re tart or out of season, add up to 2 extra tablespoons. Balance matters more than strict measurements.
Can I make it ahead?
Yes. Bake the crust a day ahead and keep it wrapped at room temp. Assemble the baked pie the day you serve it, cool fully, then hold at room temp for a few hours. For the no-bake pie, assemble the same day for best texture.
Do I need to peel or pre-cook the strawberries?
Nope. Just hull and slice. Pre-cooking all the fruit dulls freshness. We only cook part of it (or a glaze) to get that perfect set without sacrificing flavor.
Conclusion
Strawberry pie rewards a few smart moves: cold butter, a golden crust, and patience while it cools. Pick your path—baked and cozy or no-bake and bright—and let the berries do the heavy lifting. In the end, you’ll slice into something glossy, jammy, and wildly shareable. And if you eat the first slice straight from the pan? Same.