You finished painting, stepped back to admire your masterpiece, and now you’re staring at a brush that looks like it took a bath in concrete. We’ve all been there. The good news? You can save it—fast—if you clean it the right way. And if you’re already holding a brush that’s stiff as a board, don’t panic yet. You still have options.
Know Your Paint: Water vs. Oil (It Matters A Lot)
You can’t clean every brush the same way. Water-based paints (latex, acrylic) clean up with water. Oil-based paints, varnishes, and stains need solvents like mineral spirits or paint thinner. If you don’t match cleaner to paint, you’ll waste time and ruin bristles.
Quick ID Test
– Check the can: It literally tells you what to use for cleanup.
– Touch test: Dried acrylic feels plasticky; oil feels tacky longer.
– Smell test: Oil-based paints smell stronger and linger longer. Not super scientific, but it works.
Cleaning Water-Based Paint Brushes (AKA the Easy One)
Let’s start simple. If you used latex or acrylic, you can clean the brush in minutes if you act before the paint dries.
- Scrape off the excess. Use the rim of the can or a putty knife to remove extra paint. Less paint means faster cleaning.
- Rinse with warm water. Aim the water at the ferrule (the metal band) and work the paint out from the base of the bristles to the tip. Don’t mash the bristles.
- Add soap. A little dish soap goes a long way. Massage it into the bristles like shampoo. Yes, you’re giving your brush a spa day.
- Comb the bristles. Use a brush comb or an old fork to pull out the last bits. This step saves shape and prevents clumping. IMO, it’s the secret sauce.
- Final rinse and shake. Rinse until water runs clear, then flick out excess water. Don’t fling it at your dog. Or do. Your call.
- Wrap and dry. Shape the bristles with your fingers and wrap the brush head in paper or the original sleeve. Hang it or lay it flat to dry. Don’t stand it on the bristles—ever.
Stubborn Acrylic Rescue
If the paint started drying, soak the bristles (not the ferrule) in warm water with a splash of fabric softener for 30 minutes. Then soap, comb, rinse, repeat. It’s weird, but it works.
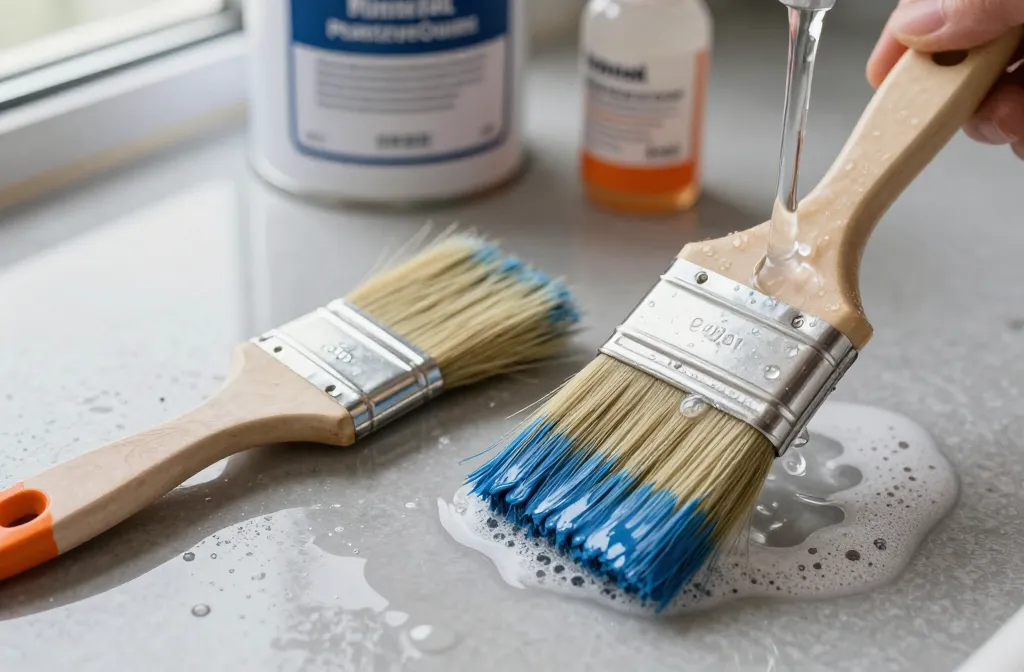
Cleaning Oil-Based Paint Brushes (AKA the Smelly One)
Oil-based paint laughs at water. You need a solvent. Mineral spirits or paint thinner work best. Odorless mineral spirits kick less smell, FYI.
- Prep your station. Work outside or in a well-ventilated area. Wear gloves. Use two or three containers you don’t mind sacrificing (jars or metal cans).
- First dip: dirty jar. Pour an inch or two of solvent, then swirl and press the brush against the sides. You’ll see the paint break loose. Don’t crush the brush—gentle pressure wins.
- Second dip: cleaner jar. Move to a fresh container and repeat. Comb the bristles if needed.
- Optional third dip: ultra-clean. If you want the brush pristine, use a final jar of clean solvent. Your future self will thank you.
- Soap and water finish. Wash the brush with warm water and dish soap to remove leftover solvent. Rinse until it stops feeling slick.
- Shape and dry. Same as water-based: sleeve or paper wrap, then lay flat or hang.
What About Natural-Bristle Brushes?
For oil-based paints, natural-bristle brushes shine, but they dry out if you don’t condition them. After cleaning, rub a drop of linseed oil or brush conditioner through the bristles, then wipe off the excess and shape.
Don’t Ruin the Ferrule (Or: Where Brushes Go to Die)
If paint dries inside the ferrule, the bristles splay and your “precision” brush turns into a mop. You’ll fight streaks forever. Avoid this horror show with these habits:
– Never soak a brush past the bristles. Keep liquid below the ferrule line.
– Wipe often as you paint. Don’t load the brush like you’re frosting a cake.
– Clean immediately after use. Every minute counts, especially with fast-drying acrylics.
Deep-Cleaning a Neglected Brush

Okay, you forgot. It happens. Here’s how to attempt a resurrection.
For Dried Water-Based Paint
– Soak in warm, soapy water for 1–2 hours.
– Add a brush cleaner or a little ammonia-based cleaner if needed. Ventilate well.
– Scrape and comb from ferrule to tip. Repeat the soak-comb cycle until the bristles move freely.
– Rinse, shape, and dry. If it still feels stiff, you might retire it to “rough work” duty.
For Dried Oil-Based Paint
– Soak in mineral spirits for 30–60 minutes, keeping the ferrule out of the bath as much as possible.
– Use a specialty brush restorer if mineral spirits don’t cut it. These products soften cured paint—follow the label closely.
– Comb gently, repeat soaks, and end with a soap-and-water wash.
– Sometimes the brush is toast. Use it for glue or epoxy next time—circle of life.
Smart Short Breaks: How to Pause Without Cleaning
Painting all day? Don’t clean every time you grab a snack.
For Water-Based Paint
– Wrap the brush head in plastic wrap or a zip-top bag.
– Press out the air and seal tight.
– Short break (under 2 hours): leave at room temp.
– Longer break or overnight: toss it in the fridge. Let it warm up before painting again.
For Oil-Based Paint
– Wrap in plastic or dip the bristles lightly in mineral spirits, then wrap.
– Keep the ferrule upright to avoid drips. Don’t refrigerate—no one wants thinner-flavored leftovers.
Storage and Brush TLC
A little care goes a long way. If you treat your brushes well, they’ll last years and save you cash.
- Store flat or hang by the handle. Bristle-down ruins the shape.
- Keep sleeves. Those little cardboard jackets aren’t trash. They’re shape-savers.
- Condition natural bristles. A tiny bit of linseed oil keeps them supple.
- Label brushes by paint type. One set for oil, one for water-based. Cross-contamination = sad, gummy mess.
- Use a brush spinner if you clean a lot. It spins out water or solvent quickly and keeps the ferrule clean.
Solvents and Disposal: Do It Right
Let’s talk safety for a sec, because fires and fumes ruin DIY vibes.
- Ventilate. Open windows, use fans, and avoid sparks or flames near solvents.
- Wear gloves and eye protection. Yes, even if you “never splash.” Today might be the day.
- Reuse mineral spirits. Let paint settle in a jar overnight, then pour off the clean top layer for next time.
- Dispose properly. Take sludge and used rags to a hazardous waste facility. Oily rags can self-ignite—store them in a sealed metal container. Not joking.
FAQs
Can I use vinegar to clean paint brushes?
For dried-on water-based paint, hot vinegar can soften residue. Heat white vinegar, soak the bristles (not the ferrule) for 20–30 minutes, then comb and wash with soap. It won’t work for oil-based paints, but as a last-ditch DIY, it’s decent.
How do I keep my brush from shedding?
Buy decent brushes, clean from ferrule to tip, and don’t crush them during cleaning. Avoid soaking the ferrule, which loosens the glue inside. Store the brush in its sleeve after shaping to keep bristles aligned and happy.
Is dish soap enough for cleaning acrylic paint?
Usually yes—if you clean right away. Warm water + dish soap + a brush comb handles most acrylics. If the paint started to cure, add a dedicated brush cleaner or try the fabric softener trick. Procrastination costs you here, FYI.
What’s the fastest way to clean a brush mid-project?
For water-based paint, rinse under warm water, soap, comb, rinse, and shake—two to three minutes tops. For oil-based, do a quick swirl in mineral spirits, wipe, repeat in a cleaner jar, then keep painting. Don’t skip combing; it prevents clumps later.
Can I put paint brushes in the dishwasher?
Please don’t. The heat warps bristles, solvents mess with rubber seals, and paint goes where dishes go. It’s a hard no from me. IMO, two minutes at the sink beats a ruined dishwasher every time.
Do I really need different brushes for oil and water-based paints?
You’ll save time and headaches if you do. Oil residue in a brush can ruin a water-based finish and make it fish-eye or streak. Label them and keep them separate like feuding cousins at a wedding.
Wrap-Up: Keep Your Brushes Alive and Kicking
Cleaning brushes doesn’t need to feel like punishment. Match the cleaner to the paint, clean from ferrule to tip, and shape them before drying. Do that, and your brushes will stay soft, precise, and ready for the next project. Future you—covered in less paint and spending less money—will be thrilled. IMO, that’s a win.