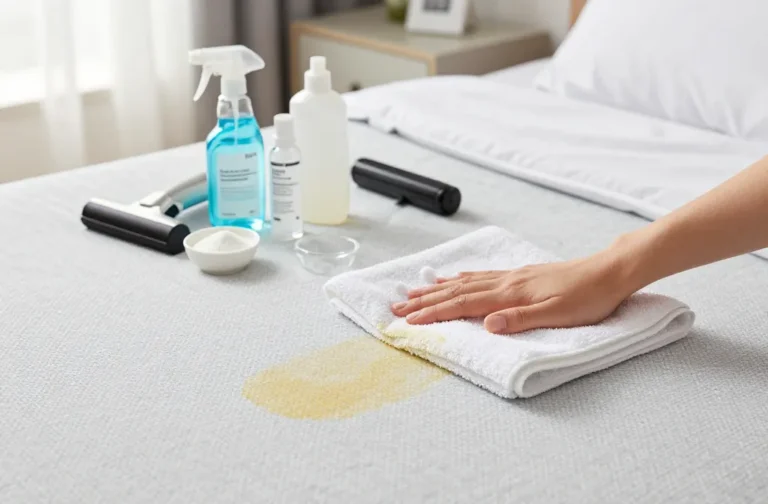
You hop in for a quick shower and—bam—your eyes land on those dark, spotty grout lines. Instant mood killer. The good news? You can tackle shower grout mold without turning your bathroom into a chemical warzone. With the right method and a little elbow grease, you’ll get those lines bright again and keep them that way. Let’s make that shower sparkle.
First, what are we dealing with?
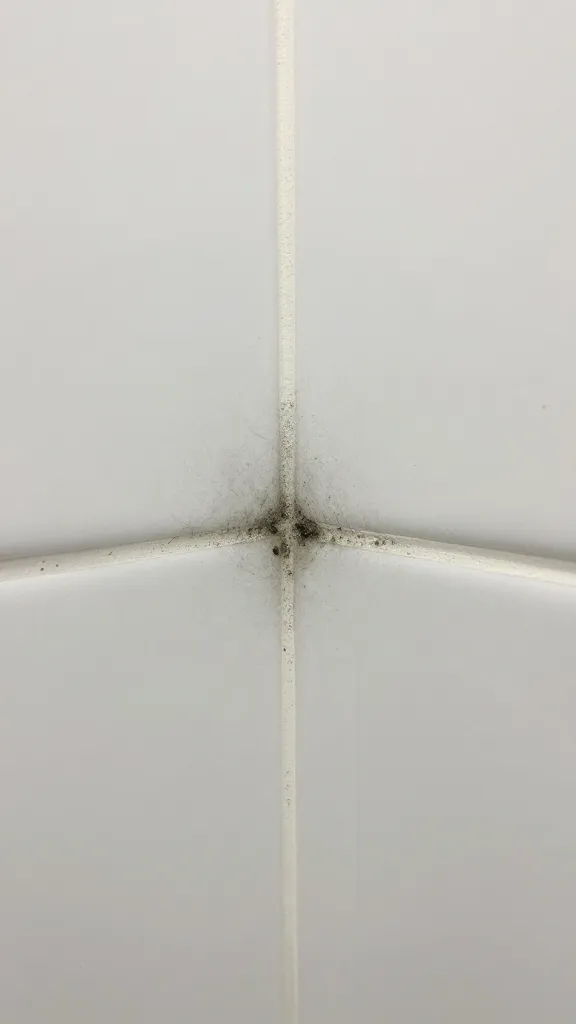
Mold loves warm, damp, slightly neglected corners—aka your shower grout. It clings to porous grout, feeds on soap scum, and throws a tiny mold party every time the bathroom steams up. Cute, right? Not so much.
You’ll usually spot two main villains:
- Surface mildew – thin, grayish or black film that wipes off easily.
- Embedded mold – darker stains lodged inside the grout. This stuff needs more muscle.
FYI: If you see fuzzy patches or smell a strong musty odor beyond the shower, you might have a bigger moisture problem behind the tile. Different beast. Different plan.
Gear up: What you need (and what you don’t)
Grab a few tools and cleaners. You don’t need a hazmat suit—just the basics:
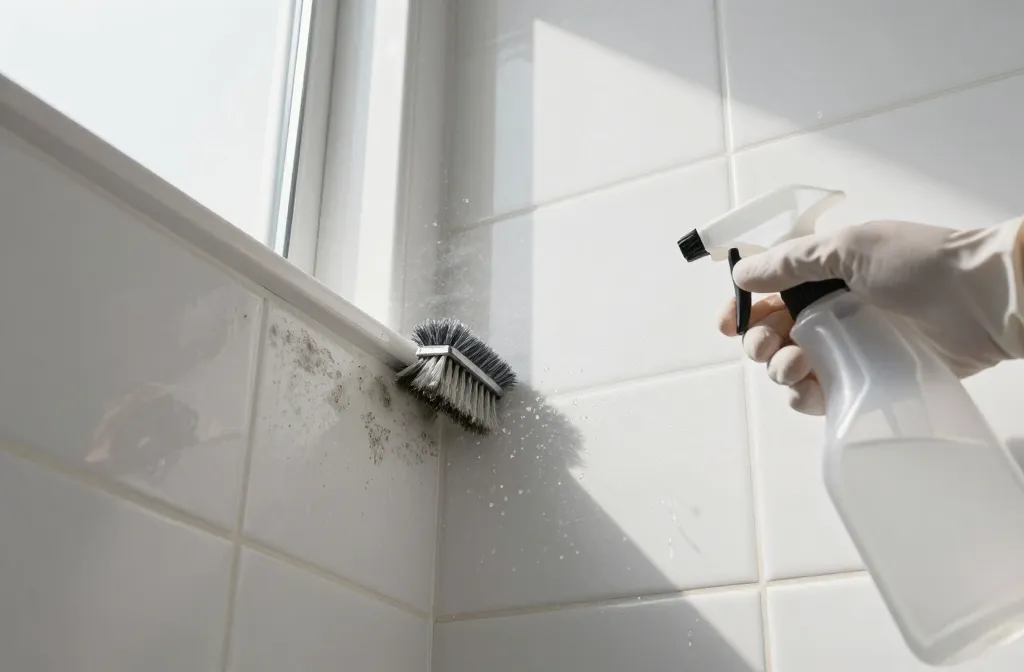
- Protective gear: Gloves, old clothes, and ventilation. Crack a window or run a fan.
- Scrubbers: A stiff grout brush or old toothbrush. Avoid metal bristles.
- Spray bottles for easy application.
- Microfiber cloths and paper towels.
- Cleaners:
- Hydrogen peroxide (3%) – great for mold, gentle on most grout.
- White vinegar – cuts soap scum and helps with mildew.
- Oxygen bleach (sodium percarbonate) – powerful yet color-safe powder.
- Chlorine bleach – the nuclear option for stubborn black mold. Ventilate well.
- Baking soda – mild abrasive for scrubbing paste.
- Dish soap – helps lift grime and body oil.
IMO: Start mild and escalate only if the mold laughs at you.
Choose your cleaning strategy
You don’t need to be a chemist, but don’t mix chemicals. Pick one route at a time.
Method 1: Peroxide + Baking Soda (most bathrooms)
This combo hits mold without choking fumes.
- Make a paste: 1/2 cup baking soda + enough hydrogen peroxide to form thick toothpaste. Add a squirt of dish soap for extra slip.
- Apply paste along the grout. Press it in with your brush.
- Let it sit 10–15 minutes. Peroxide needs time to work.
- Scrub in short, firm strokes. Focus on the darkest lines.
- Rinse well with warm water.
- Repeat on stubborn spots or move to oxygen bleach if needed.
Method 2: Oxygen Bleach Soak (for set-in stains)
Check the label for dilution. Most powders dissolve in warm water.
- Mix per package directions. Stir until clear—no gritty bits.
- Saturate grout lines with the solution using a sponge or spray bottle.
- Let it dwell 15–30 minutes. Keep it wet. Reapply if it dries.
- Scrub, rinse thoroughly, and towel-dry.
Bonus: Oxygen bleach deodorizes and brightens tile too. It’s like a shower reset button.
Method 3: Chlorine Bleach Spot-Treat (last resort)
If black mold still clings on, bring out bleach—carefully.
- Open windows, run the fan, and wear gloves.
- Mix a 1:10 solution (1 part bleach, 10 parts water) in a labeled spray bottle.
- Spray just the grout lines—avoid metal fixtures and colored grout if possible.
- Let sit 5 minutes max. Do not mix with vinegar, ammonia, or anything else. Ever.
- Scrub lightly, rinse like crazy, then rinse again.
FYI: Bleach removes color from stains and kills surface mold, but it can’t fix crumbling grout. If grout crumbles, skip to repairs.
Detail work: Tools, technique, and patience
You don’t need to scrub like you’re punishing the tile. Technique beats brute force.
- Brush angle: Hold the brush at 45 degrees and scrub along the line, then across. You’ll reach the pores better.
- Short sessions: Work in 2–3 foot sections. Clean, rinse, move on. It keeps cleaners active and you sane.
- Dwell time is magic: Let cleaners sit. You’ll scrub half as hard.
- Rinse and dry: Always rinse after each section and towel it dry so you can see what remains.
What about natural stone?
If you have marble, travertine, or limestone, avoid vinegar and strong acids. Use pH-neutral stone cleaner + peroxide or oxygen bleach only if the stone manufacturer approves. Test in a corner first. Stone can etch faster than your patience runs out.
When to repair instead of scrub
Sometimes grout just gives up on life.
- Cracks and gaps: Water sneaks in, mold thrives behind the tile. Regrout or recaulk those sections.
- Old, powdery grout: If it rubs off on your finger, it needs replacing, not cleaning.
- Black mold behind silicone: If silicone caulk looks moldy inside, remove and replace it. No cleaner can fix that.
Quick regrout and recaulk tips
- Scrape out failing grout at least 1/8 inch deep with a grout saw or oscillating tool.
- Vacuum dust, wipe clean, and let dry completely.
- Apply fresh grout, wipe with a damp sponge, and cure per instructions.
- For corners and tub edges, use 100% silicone bathroom-grade caulk with mold inhibitors.
Seal it so mold can’t move back in
Once clean and fully dry, seal the grout. It’s like giving it a raincoat.
- Penetrating grout sealer: Apply with a small brush or applicator bottle. Wipe tile immediately.
- Let the first coat soak in, then add a second. Follow the brand’s cure time.
- Reseal every 6–12 months in heavy-use showers.
Sealer won’t stop mold forever, but it slows moisture absorption, which makes cleaning way easier. IMO, this step saves you hours down the line.
Keep it clean with low-effort habits
You don’t need to become the Shower Monitor. Just a few tiny habits keep mold bored and unemployed.
- Daily quick-dry: After showering, squeegee walls and glass. Then towel the grout lines you can reach.
- Ventilate: Run the exhaust fan during and 20 minutes after showers. Crack the door if possible.
- Weekly spray: Mix a maintenance spray: 1 cup water + 1 cup vinegar + a few drops of dish soap. Spray, wait 5 minutes, rinse. Skip vinegar if you have natural stone.
- Monthly deep clean: Hit grout with peroxide spray and a quick scrub. Takes 10 minutes, saves 2 hours later.
- Elbow grease budget: Keep a dedicated grout brush in the shower. If you see a spot, 10 seconds now beats 30 minutes next month.
FAQs
Can I use vinegar and bleach together for extra power?
Nope. Never mix vinegar (acid) with bleach. You’ll make toxic chlorine gas, which is about as fun as it sounds. Use one method at a time, rinse well, then switch if needed.
Will a steam cleaner help with grout mold?
Yes, for maintenance and light mildew. A steam cleaner loosens grime and can sanitize surfaces, but it won’t always remove deep, embedded stains. Use it after applying a cleaner for a one-two punch.
How do I know if it’s mold or just dirt?
Mold usually shows up as dark specks or fuzzy patches that reappear fast after a light wipe. Dirt smears and lifts easier. If peroxide foams a bit on contact, that’s often a sign of organic gunk like mold. When in doubt, clean it as mold and monitor if it returns.
Is bleach safe for colored grout?
Bleach can lighten pigmented grout, so test in an inconspicuous spot first. If it fades, stick with peroxide or oxygen bleach, which are usually safer for color.
What if the mold smell won’t go away?
Persistent odor means moisture hides somewhere. Check for failed caulk, loose tiles, or leaks. Dry out the bathroom thoroughly, run a dehumidifier, and address any gaps with new caulk or grout. If smell persists, consider calling a pro to rule out hidden water damage.
Do I need to wear a mask while cleaning?
If you’re using bleach or you’re sensitive to odors, yes. A simple disposable mask helps, and good ventilation makes a big difference. Gloves always help protect your skin from dry-out and irritation.
Wrap-up: Send mold packing
You don’t need fancy products or a weekend-long battle. Pick a method, give it some dwell time, scrub smart, and rinse well. Seal the grout, dry the shower, and keep air moving. Do that, and mold will stop treating your grout like a timeshare. Clean lines, brighter tile, and showers that feel like a reset—mission accomplished.