Your makeup brushes look cute on your vanity, sure—but they’re also hoarding foundation gunk, oil, and yesterday’s glitter like it’s their job. Breakouts? Patchy blending? Weird smells? Yep, dirty brushes can do that. The good news: you can deep-clean them at home with stuff you already own and make them feel brand new in under 20 minutes. Let’s scrub smarter, not harder.
Why cleaning your brushes actually matters
You don’t need a lecture—just facts. Dirty brushes spread bacteria, clog pores, and irritate your skin. They also make your makeup apply streaky and dull because product buildup roughens the bristles.
Clean brushes = smoother blending, truer colors, and happier skin. Plus, regular cleaning keeps the bristles soft and helps your tools last way longer. Your wallet says thank you.
What you’ll need (no fancy kit required)
You can totally MacGyver this. Grab:
- Mild cleanser: baby shampoo, unscented face wash, gentle dish soap, or a dedicated brush soap
- Oil (optional for heavy buildup): olive oil or coconut oil
- A bowl for soapy water
- A textured surface: your palm, a silicone mat, or even a rubber glove with texture
- Clean towel or paper towels
- Rubbing alcohol (70%) for handles only
- Warm water—not hot, not cold
FYI: Hot water can melt glue and loosen the ferrule (the metal part). That’s how brushes shed and get sad.
The simple step-by-step: deep clean in 10 minutes
Do this once a week for face brushes, every two weeks for eye brushes. If you wear makeup daily, bump that up.
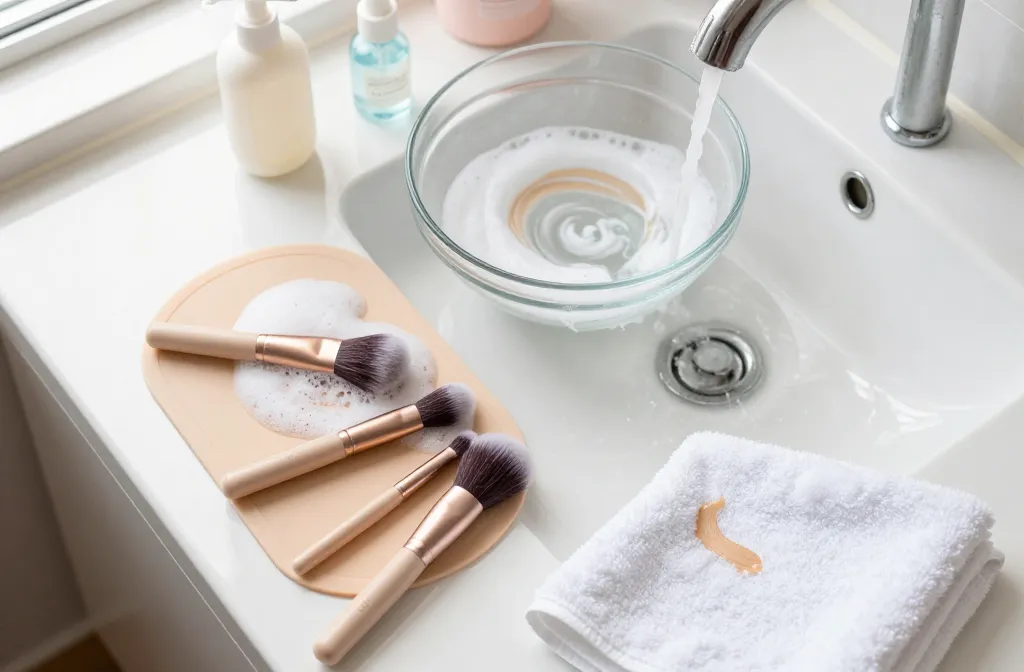
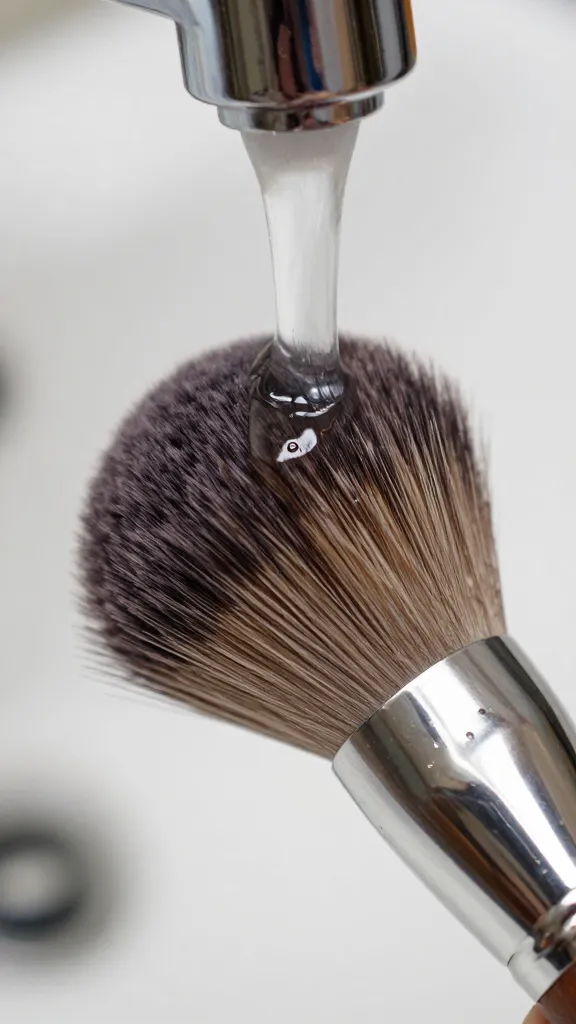
- Wet just the bristles with warm water, bristles pointing down. Keep water away from the handle and ferrule so you don’t loosen the glue.
- Add cleanser to your palm or mat—about a dime-sized amount. For caked-on foundation, mix a tiny drop of oil with the soap first.
- Swirl gently until the lather runs tan/gray. You’ll see the old product leave like a bad ex.
- Rinse thoroughly, bristles down, until water runs clear. Squeeze from base to tip—gently.
- Repeat if needed for dense brushes. Foundation and cream product brushes sometimes need round two.
- Reshape the bristles with your fingers so they dry pretty and fluffy.
- Lay flat to dry on a towel with the bristles hanging off the edge of a counter. Airflow = faster dry, zero mildew smell.
Speed tip: the towel taco
Roll a folded towel to create a little ramp and lay brushes with the bristles slightly angled downward. Water won’t creep into the ferrule. Simple physics, zero drama.
Quick clean between uses (so you’re not mixing yesterday’s smokey eye)
Between deep cleans, use a quick-dry method:
- DIY spray: In a small spray bottle, mix 2 parts water + 1 part rubbing alcohol + a few drops of gentle soap. Spritz bristles, wipe on a towel until clean, air-dry for 2–3 minutes.
- Micellar water: Works great on eyeshadow brushes. Dip a corner of a cotton pad, swipe bristles, done.
IMO, a quick clean saves your looks when you bounce between matte browns and neon shimmer. Your crease brush deserves boundaries.
Different brushes, slightly different rules
Not all bristles behave the same. Treat them like the little divas they are.
Dense foundation and concealer brushes
They hoard cream products. Use a tiny drop of oil before the soap step to dissolve buildup. Rinse longer. Squeeze out water from base to tip twice.
Fluffy powder and blush brushes
They need less soap, more patience. Swirl on a larger textured surface so the lather reaches the core.
Eyeshadow and liner brushes
Use less water and less pressure. For angled liner brushes, pinch the bristles into a crisp edge while reshaping so your wing stays sharp later.
Natural vs. synthetic bristles
- Natural bristles (goat, sable, etc.): treat like hair. Use a gentle shampoo and add a tiny drop of conditioner once a month for softness. Rinse very well.
- Synthetics (nylon, taklon): they’re tanks. Dish soap or brush soap works great, especially on oily creams.
What to avoid (so you don’t murder your brushes)
- No soaking the whole brush. That floods the ferrule and loosens glue.
- No boiling or hot water. You’re not making soup; you’re saving bristles.
- No hair dryers on high heat. Air dry only to keep shape and glue intact.
- No harsh cleaners like bleach. Overkill and damaging.
- Don’t store wet in a cup bristles-up. Water runs down the handle and ruins it from the inside.
How to dry faster without wrecking them
Drying takes time, but you can speed it up safely.
- Blot first: Press gently in a towel to remove extra water—don’t twist.
- Use airflow: Place near a fan (not directly blasting). They’ll dry in a few hours instead of overnight.
- Brush guards: Slide on mesh guards while drying to keep domed shapes crisp and prevent splaying.
Disinfect the handles
Handles get foundation fingerprints and bacteria. Wipe with rubbing alcohol on a cotton pad. It dries fast and keeps them looking less like they lived in your gym bag.
DIY brush cleanser recipes that actually work
Want a make-once-use-often situation? Mix a small batch.
- Cream cleanser: 3 tbsp gentle dish soap + 1 tbsp olive oil. Whisk. Dab onto bristles, then rinse. Great for cream products.
- Foaming face-wash mix: 1/2 cup water + 2 tbsp baby shampoo + 1 tsp glycerin (optional). Store in a pump bottle. Super gentle for daily use.
- Quick-dry spray: 1/2 cup water + 1/4 cup rubbing alcohol + 1 tsp mild soap. Shake before each use.
FYI: Make small batches and refresh monthly. Cleaners can separate or go funky over time.
Storage and maintenance for longer-lasting brushes
Treat them right and they’ll outlive your current palette obsession.
- Store upright in a cup or roll pouch with bristles covered. Keep dust and pet hair off (we see you, cat owners).
- Keep them dry: Avoid steamy bathrooms—humidity warps wooden handles.
- Rotate a few favorite brushes so each has recovery time between washes.
- Trim flyaways? Don’t. That changes the shape. If a brush sheds a lot, it might be time to replace it.
FAQ
How often should I clean my makeup brushes?
Face brushes that touch liquid or cream products need a weekly deep clean. Eye brushes can go 1–2 weeks depending on use. Do a quick clean between colors or looks so you don’t muddy your blending, IMO.
Can I use regular shampoo or bar soap?
Yes to gentle shampoo, preferably sulfate-free. Skip harsh bar soaps because they can dry out bristles and leave residue. If a bar is your only option, use a very light touch and rinse like your life depends on it.
What if my brush still smells or looks stained?
Do a second cleanse with a drop of oil mixed into your soap for cream products. Some pigments stain, especially reds and blues—staining doesn’t mean it’s dirty if the rinse water runs clear and it smells neutral.
Is rubbing alcohol safe for bristles?
Use it on handles only. Alcohol can dry and damage bristles, especially natural hair. For bristles, rely on soap and water for cleaning, and let full drying handle the rest.
How long do brushes take to dry?
Small eye brushes can dry in 2–4 hours with good airflow. Dense face brushes may need 6–12 hours. Wash at night and they’ll be ready by morning—unless you used a kabuki the size of a small animal.
Do I really need a silicone cleaning mat?
Nope. Your palm works fine. A textured mat just speeds things up and saves your skin from pruning during a wash marathon.
Wrap-up: clean tools, better makeup, happier skin
Clean brushes don’t just look tidy—they perform better, blend smoother, and treat your skin kindly. You can do it with warm water, a gentle cleanser, and a towel. Keep it quick weekly, spot clean when needed, and store them smart. Your future foundation application will glide like butter, and your face will thank you—quietly, without breakouts.