Grout makes your tile look crisp and clean… until it doesn’t. One day it gleams; the next it looks like a crime scene of soap scum, mildew, and who-knows-what. Good news: you don’t need fancy tools or a hazmat suit. You just need the right approach, a bit of elbow grease, and snacks for morale.
Know Your Grout (And Why It Gets Gross)
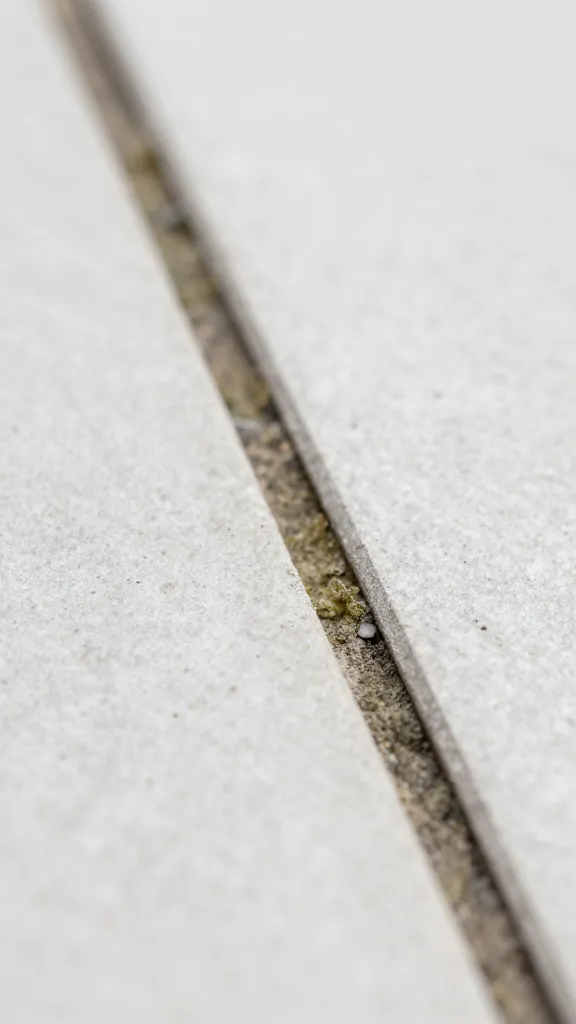
Grout is porous. It drinks up moisture, dirt, and soap scum like a tiny sponge, then holds onto it for dear life. That’s why it stains faster than the tile.
Different grout types matter, too. Sand-based grout (common in floors) can handle scrubbing. Unsanded grout (usually on walls and small joints) needs a gentler touch. Epoxy grout resists stains like a champ but can still look dull from surface gunk.
Quick ID tips
- Sanded grout: feels gritty; found in wider joints (1/8″+)
- Unsanded grout: smooth; narrow joints (under 1/8″)
- Epoxy grout: slightly plastic feel; super stain-resistant
Gather Your Gear (Nothing Wild)
You don’t need a chemical lab. You need a small lineup that covers light, medium, and heavy grime.
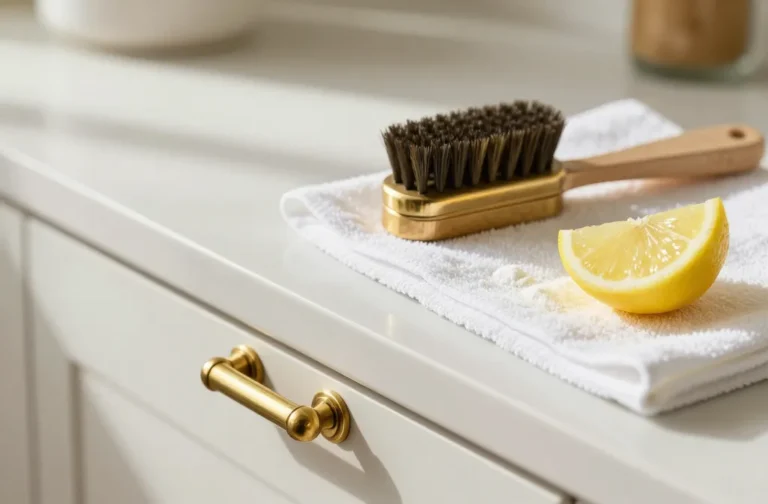
- Soft nylon brush or old toothbrush (skip wire brushes)
- Microfiber cloths and a small bucket
- Baking soda, white vinegar, hydrogen peroxide (3%)
- Dish soap (plain, no lotion junk)
- Oxygen bleach powder (sodium percarbonate) for deeper cleaning
- Rubber gloves and decent ventilation (especially for strong cleaners)
- Optional: steam cleaner, grout sealer, kneepads (your future self will thank you)
The Basic Routine: Gentle First, Stronger If Needed
Start mild and escalate only if the grout talks back. This saves your grout’s integrity and your sanity.
- Dry scrub. Run a dry brush over the joints to loosen surface dirt. It looks silly, but it works.
- Soapy warm water. Mix a few drops of dish soap in warm water. Scrub the joints, rinse, and wipe.
- Baking soda paste. For stains, mix baking soda with water into a paste. Smear it on the lines and let it sit 5–10 minutes.
- Activate with vinegar. Spray or dab vinegar over the paste. It will fizz—chemistry class flashback! Scrub gently, rinse thoroughly.
When to stop
If the grout looks 80% better, call it a win for today. IMO, chasing “perfect” often just wears out the grout and your patience.
Level Up: Peroxide and Oxygen Bleach
When soap scum and mystery stains laugh at vinegar, bring in the next tier.
Hydrogen peroxide method (non-chlorine)
- Mix: Baking soda + a few teaspoons of 3% hydrogen peroxide into a spreadable paste.
- Apply: Coat the grout, let sit 10–15 minutes.
- Scrub: Use a nylon brush; work in small sections.
- Rinse well: Peroxide lifts gunk; you don’t want it drying back down.
FYI: Peroxide brightens without the harshness of chlorine bleach, and it plays nicer with most grout types.
Oxygen bleach soak (for heavy, dingy lines)
- Dissolve: Follow the label—usually 1 scoop per gallon of very warm water.
- Apply generously: Pour along grout lines or use a squeeze bottle. Keep it wet 10–15 minutes.
- Scrub and rinse: Agitate with a brush; rinse until water runs clear.
Pro tip: Oxygen bleach excels on old, uniform dinginess. It won’t etch like acids and it’s bathroom-safe when used as directed.
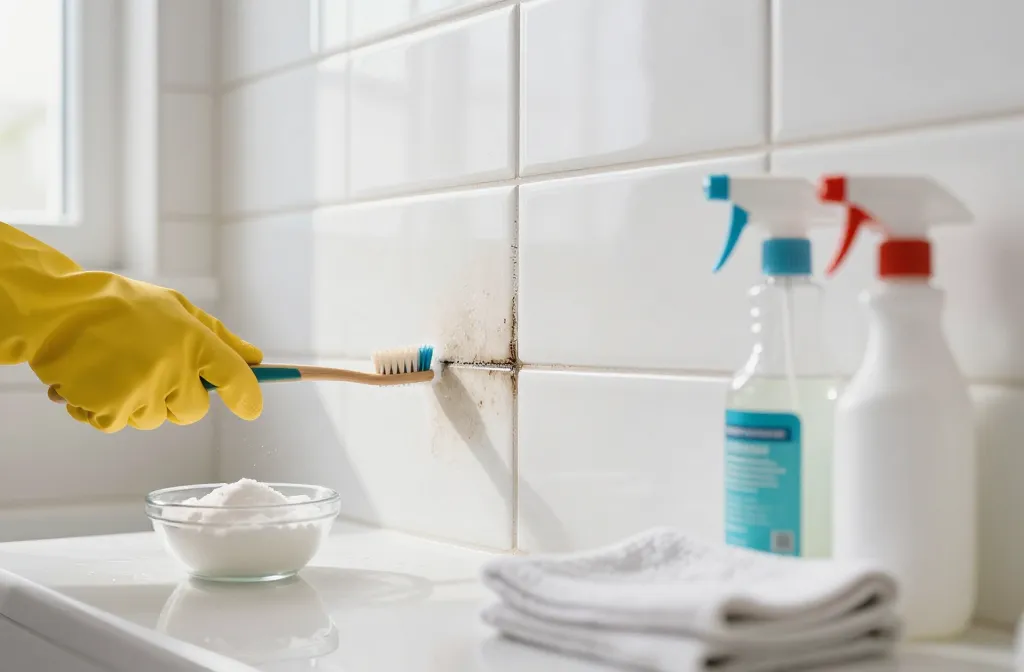
Mold and Mildew: Target the Funk
Black or pink spots? That’s mildew (or its ruder cousin, mold). Attack it fast and keep the area dry afterward.
Steam cleaning
A handheld steam cleaner blasts spores out of pores (say that three times). Use a narrow nozzle, move slowly, then wipe immediately. Steam shines for shower corners and caulk edges.
Spot treat with peroxide
Soak a cotton ball or paper towel in 3% peroxide and press it on the stain for 10 minutes. Remove, scrub lightly, rinse. Repeat once if needed. Vinegar can help, but don’t mix it with bleach—ever.
Skip straight chlorine bleach on regular grout unless nothing else works. It can weaken grout over time and discolor nearby materials. If you do use it: dilute heavily, ventilate well, and rinse like you mean it.
Avoid These Common Mistakes
Let’s save you some pain and a potential call to a contractor.
- Don’t go nuclear first. Strong acids or undiluted bleach can etch grout and cloud stone.
- No wire brushes. They chew grout and leave metal marks. Nylon only.
- Test first. Especially on natural stone like marble, travertine, or slate. Vinegar and acids can etch stone—use pH-neutral cleaners there.
- Rinse every time. Cleaner residue attracts dirt. Rinse, then wipe dry.
- Watch the clock. Don’t let any cleaner dry on the surface. Keep it wet during dwell time and then rinse.
Seal the Deal (Literally): Keep Grout Cleaner Longer
Clean grout deserves protection. Sealer buys you time and sanity.
Choosing a sealer
- Penetrating/impregnating sealer: Best for most cement-based grouts; keeps water and stains out while letting moisture escape.
- Topical sealer: Forms a film; can look shiny and wear unevenly—skip for floors, IMO.
- Epoxy grout: Often doesn’t need sealing, but check the manufacturer.
How to apply
- Let grout dry completely after cleaning—24 hours minimum, 48 is safer.
- Apply with a small brush or applicator bottle right on the lines.
- Wipe tiles quickly to prevent haze. Follow the label’s cure time.
- Re-seal high-traffic areas every 6–12 months; showers yearly.
Quick Routines That Actually Stick
Consistency wins. Don’t turn grout care into a weekend-eating saga.
- After showers: Squeegee tile and run the fan 20 minutes. Moisture feeds mildew.
- Weekly wipe: Warm water + a drop of dish soap. Two minutes, max.
- Monthly refresh: Baking soda paste scrub on trouble spots; quick rinse.
- Seasonal deep clean: Oxygen bleach soak and re-seal if water no longer beads.
FAQ
Can I use vinegar on all grout?
Use it on ceramic or porcelain tile with cement-based grout—usually fine. Avoid vinegar on natural stone like marble or travertine; it can etch the stone. If you’re unsure, test a tiny, hidden area first. When in doubt, switch to a pH-neutral cleaner.
What’s the fastest way to brighten grout before guests arrive?
Make a quick baking soda and peroxide paste, spread it, let it sit 10 minutes, then scrub and rinse. Dry the area with a towel to prevent water marks. It won’t fix deep stains instantly, but it delivers a noticeable lift fast.
Do magic eraser sponges work on grout?
They can help with surface grime on the tile and the top of the grout. But they’re mildly abrasive, so don’t sand one spot like you’re polishing a diamond. Use gentle pressure and rinse well.
My grout looks pitted and crumbly. Can I still clean it?
Clean carefully, but consider regrouting or a grout “refresh” product. Crumbling grout traps dirt and moisture, and cleaners won’t fix structural issues. Small repairs now beat a full redo later, FYI.
Is recoloring grout worth it?
If stains won’t budge, a grout color sealer can work magic. It dyes and seals at the same time and can make old grout look brand new. Prep matters: deep clean first so the color bonds evenly.
Will a steam cleaner damage grout?
Used properly, no. Keep the nozzle moving, don’t blast one spot forever, and wipe up loosened grime immediately. Skip steam on unsealed, moisture-sensitive stone or where water intrusion could cause issues behind tile.
Conclusion
Grout gets grimy because it’s doing its job. You can bring it back with simple tools: soap and water first, then baking soda, vinegar or peroxide, and oxygen bleach when needed. Seal it after, keep moisture in check, and do tiny maintenance moves regularly. Your tile will look sharp, your bathroom will smell fresher, and you can retire the “we only use the guest bath” policy—IMO, that’s a win.