Your headlights looked crystal-clear when you drove off the lot. Now they’re cloudy, yellow, and barely brighter than a candle in a jar. Night driving feels sketchy, and your car looks older than it is. Good news: you can fix this at home with a little elbow grease and the right approach.
Why Headlights Get Cloudy (And Why You Should Care)
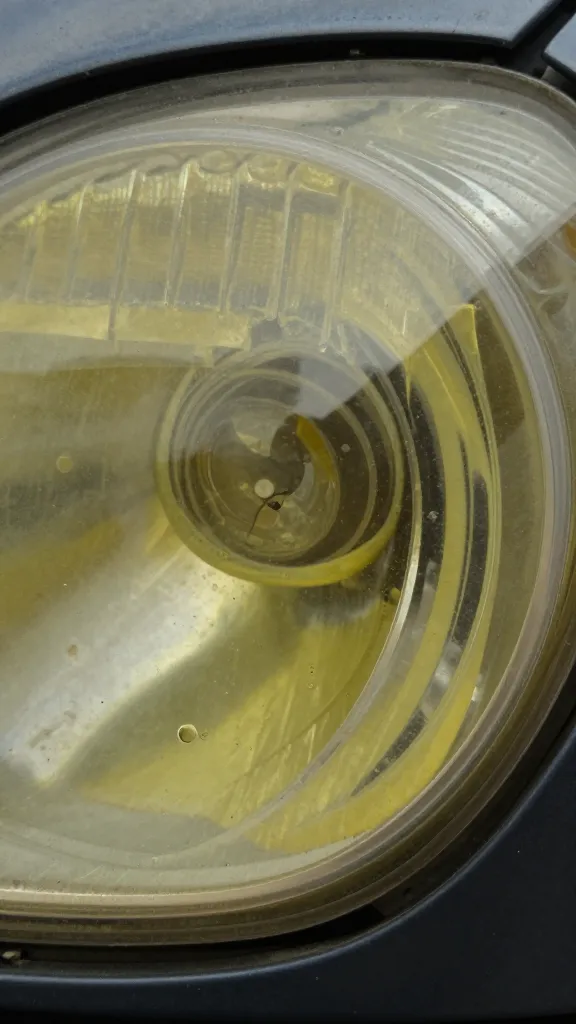
Your headlight lenses use polycarbonate plastic. It’s tough, but UV light, grit, and chemicals rough it up over time. That cloudy haze scatters light instead of focusing it down the road.
You lose style points, sure, but you also lose visibility. Dirty, oxidized headlights can chop your nighttime range by 50%+. That’s the difference between seeing a pothole and buying a rim. So yeah, it matters.
Quick Check: Do You Need a Deep Clean or Just a Wash?
Before you break out the sandpaper like you’re restoring the Mona Lisa, figure out what you’re dealing with. Run through this:
- Just dusty/dirty? Soap, water, and a microfiber cloth. Done in 2 minutes.
- Greasy film/road tar? Use an automotive-safe degreaser or isopropyl alcohol (diluted) after washing.
- Cloudy/yellowed? That’s oxidation. You’ll need polishing. Maybe sanding.
- Moisture inside the lens? That’s a seal issue. Cleaning the outside won’t fix internal fog.
Pro tip
If you can scratch the haze off with your fingernail, it’s on the surface. If not, you’re dealing with deeper oxidation and need a more serious approach.
What You’ll Need (No Fancy Shop Required)
Grab a few basics. You don’t need all of these for every method, but they come in handy.
- Car wash soap and water
- Microfiber towels (several)
- Masking tape (to protect paint)
- Plastic polish or headlight restoration compound
- UV sealant or ceramic/clear coat for plastic (crucial)
- Sandpaper in grits: 800, 1000, 1500, 2000, 3000 (if you’re going deep)
- Spray bottle with water (a drop of soap helps)
- Optional: drill with foam pad for polishing, nitrile gloves
Method 1: The Quick Clean (For Light Haze)
If your lenses just look a little tired, start here. It’s low risk and often all you need.
- Wash the headlights with car soap and water. Dry thoroughly.
- Tape around the headlights to protect paint. You’ll thank yourself later.
- Polish with a plastic polish on a microfiber. Work in small circles with moderate pressure for 2–3 minutes per lens.
- Buff with a clean towel until clear.
- Seal the lens with a UV protectant. Seriously—don’t skip this. Oxidation comes back fast without it.
When it works
This revives mildly cloudy or slightly yellow lenses. If they only look 10–20% better, move to Method 2.
Method 2: The Full Restore (For Yellow, Cloudy, or Scratched Lenses)
This one takes patience, but it’s legit. You’ll sand off the damaged layer, polish the plastic, and lock it in with a UV seal.
- Clean and tape like above. Don’t rush this.
- Wet sand with 800 grit. Keep the surface wet. Sand in straight, overlapping passes. Your goal: remove all yellowing and deep scratches. The lens will look evenly cloudy—perfect.
- Progress through grits: 1000, 1500, 2000, then 3000. Alternate sanding directions each grit so you can see the previous scratches disappear.
- Polish with a plastic or headlight compound using a foam pad or microfiber. Work it until the lens turns clear and glossy.
- Degrease lightly with isopropyl alcohol (diluted) to remove polishing oils.
- Apply UV sealant per instructions. Some wipe on, some spray, some require curing. Follow the label like your clarity depends on it—because it does.
How long it lasts
With a good UV top coat, expect 1–2 years before you need a light touch-up. Without it? Maybe a couple of months. FYI: that’s why “toothpaste fixes” never last.
About Those Viral Hacks (Toothpaste, Bug Spray, Baking Soda…)
Let’s be honest: they “work,” but mostly as temporary party tricks.
- Toothpaste: Mild abrasive. It can brighten lenses short-term. Without sealing, the haze returns fast. Also, minty headlights aren’t a feature.
- Bug spray (DEET): It melts the plastic surface. Looks clear today, crazed and worse later. Skip it.
- Baking soda/vinegar: Cleans dirt, not oxidation. Fine for maintenance, not restoration.
The verdict
If you just need a quick improvement before selling the car tomorrow, fine. But for real results, polish or sand + seal. IMO, it’s worth the extra 30 minutes.
Pro-Level Tips for a Cleaner, Clearer Job
You can absolutely do this in your driveway. Use these to make it look pro.
- Work in the shade. Direct sun dries water and polish too fast and can streak sealants.
- Keep it wet when sanding. Water carries away plastic dust and prevents deep scratches.
- Even pressure, slow passes. Don’t dig in on edges; they’re easy to burn through.
- Check your progress often. Wipe dry and inspect. Don’t move up a grit until the previous scratches are gone.
- Use fresh pads and clean towels. Contamination = scratches.
- Seal right away. Oxidation starts again the second you expose fresh plastic to air and sun.
Choosing a UV Sealant
You’ve got options:
- Dedicated headlight UV wipes: Easy, good durability, great for DIY.
- Spray ceramic coatings safe for plastic: Longer-lasting but more prep-sensitive.
- 2K clear coat (aerosol): Hardest and longest-lasting, but mask heavily and follow safety precautions. Not beginner-friendly.
Maintenance: Keep Them Clear Longer
Don’t do all this work just to repeat it in six months. Protect your investment with a few habits.
- Wash and dry headlights when you wash the car. Quick wipe = less buildup.
- Top-up UV protection every 2–4 months with a sealant or ceramic topper.
- Park in the shade or garage when possible. UV is the main villain.
- Apply PPF (paint protection film) to headlights for a long-term barrier. It’s like sunscreen plus a shield.
FAQ
Can I use a drill or should I polish by hand?
Both work. A drill with a foam pad speeds things up and gives more uniform results, but you must keep it moving and avoid edges. Hand polishing takes longer but offers more control for beginners.
How do I know when to stop sanding?
Stop when the lens looks evenly frosted and you’ve removed all yellowing or deep scratches from the previous step. If you still see yellow edges or random clear patches, keep going with the same grit before moving up.
Do restoration kits actually work?
Most decent kits include graded sandpapers, a polish, and a UV sealant. They work well if you follow the directions. The key is the UV step; if the kit skimps on that, results won’t last.
Can I fix moisture or fogging inside the headlight?
External cleaning won’t fix internal condensation. You’ll need to reseal the housing, replace gaskets, or in some cases replace the unit. If water sits inside, address it ASAP to prevent reflector damage.
Will polishing remove factory UV coating?
Yes, when you sand or polish aggressively, you remove what’s left of the original UV layer. That’s why you must apply a new UV sealant right after polishing. No sealant = fast re-oxidation.
Is clear coat safe on headlights?
Automotive 2K clear coats can work great and last long if applied correctly, but they require careful masking, ventilation, and curing. If that sounds stressful, use a wipe-on UV sealant designed for headlights instead. FYI: single-component rattle-can clears don’t hold up as well.
Wrap-Up: Clear Lenses, Clear Road
Cloudy headlights make night driving harder and your car look tired. You can fix both in an afternoon with a wash, polish, and—when needed—a careful sand. Always finish with UV protection so your hard work sticks. Do it once, do it right, and enjoy seeing the road like your car just got new eyes. IMO, it’s one of the highest-ROI DIY jobs you can do.